In-seat ordering allows you to assign customer locations to an order. When configuring in-seat ordering you will need to set up your sections and seats with all the information you'll need to ensure the customer receives their order. This article will explain how to create your seats and how to use in-seat ordering.
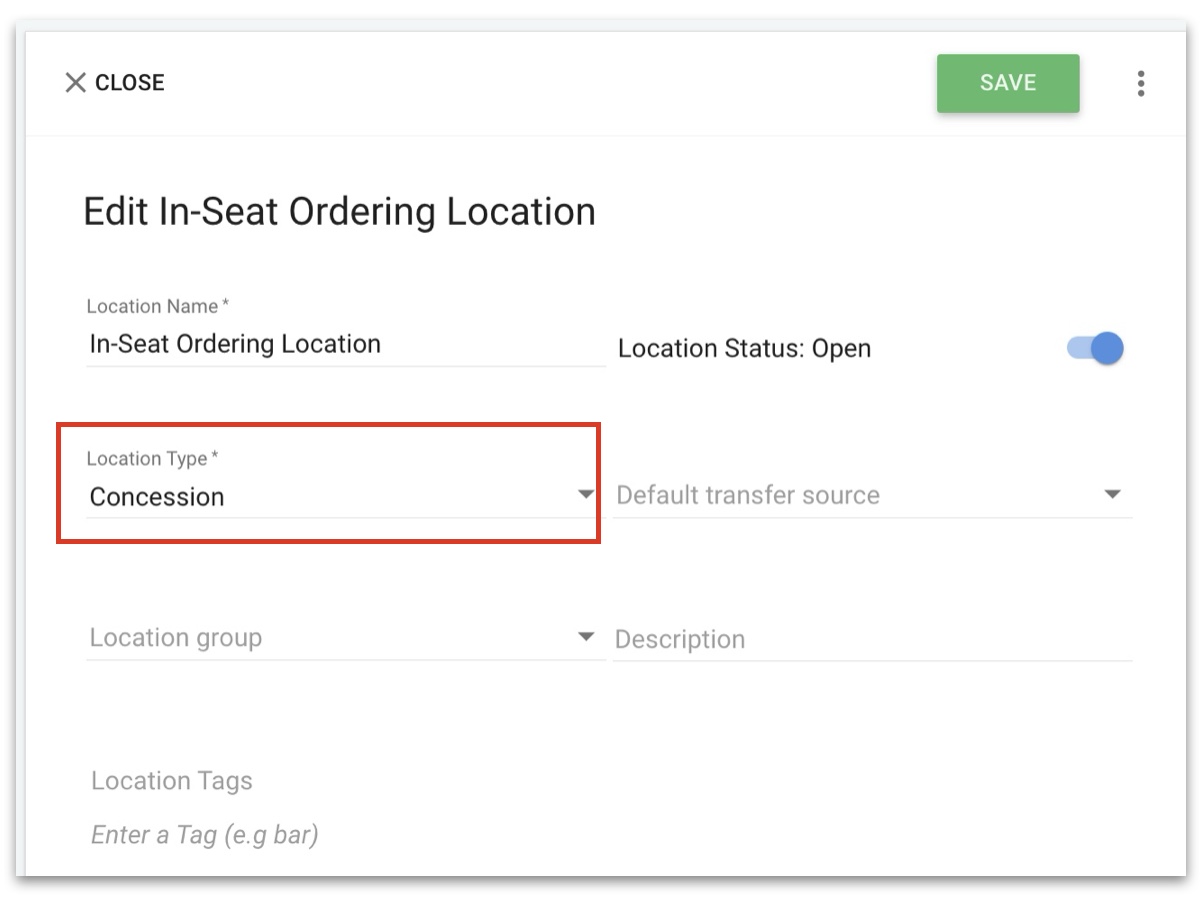
Location Type
When creating a Location that will use In-Seat Ordering, ensure that you select the Location Type: Concession. This is the only Location Type that allows you to associate orders with a Section, Seat, and Row.
1. Navigate to POS Manager > Locations.
2. Select the Location that will use In-seat ordering or create a new one.
3. Under Location Type, select Concession.
Back to Top
Creating Sections
1. To create a section navigate to Configuration > Service Locations > Sections.
Existing sections are organized alphabetically in the main view. To create a new section, click the green Create button in the upper-right corner.
2. Fill out the following information:
Please note that you must have a Section, Row, and Seat for in-seat ordering to function properly on the Flex device.
- Name - Name of the section. This is how it will appear on the register and on the chit. See note below.
- Description - You can add a short description if needed but it is not required.
- Pickup Concession - Match this location to your in-seat location.
- In-seat Concession - Here we will attach the location, this is what will show what items are available for any menu that the location is attached to. This will also be where the ticket is printed.
- Rows - Type out all rows after clicking Add Row. How it is typed here will be how it appears on the register and on the chit.
Note: If you are creating numbered seats such as Box seats, ensure that your numbers are two digits to keep the boxes in the correct order on the display. For example, if a box is Box 1 use Box 01 then Box 02, and so on. If you use one digit, your boxes will display as Box 1, Box 10, Box 11, etc.
3. Once you have filled out all the above information you can save by clicking the green Save button.
Employee Settings
For an employee that will be working in locations that utilize In-Seat ordering, deselect Portables on their employee profile. That way, when they log into the Flex, it will default to Ordering Mode.
1. Navigate to Labor > Employee.
2. Click the Employee you would like to use in-seat ordering or create a new employee.
3. Under Login Permissions, ensure that Portables is unchecked.
4. Click Save.
Using In-Seat Ordering the Flex
When logging into a mobile device, like a Clover Flex, the device will start in In Seat ordering mode if you have your employees set up as described in the previous section.
1. To create an order click the Blue Plus Icon and choose the Service Location.
2. Tap the Select Your Service Location and then choose the section that was created. Once you have your section selected you will be able to select the Row and Seat.
3. When the Section, Row, and Seat are selected just tap Order. When the ticket is printed at the location we had set up earlier it will list the items and the Row and seat we selected.