Tax Groups are a collection of Tax Rates that get attached to Menu Items. A Tax Group can hold one or more Tax Rates. This article will explain how to create Tax Groups and Tax Rates and apply the groups to the correct Menu Items.
Table of Contents:
- How to Create a Tax Group
- Assigning a Tax Group to an Item
- Mass Assigning Tax Groups
- Tax Exclusive vs. Tax Inclusive Pricing
How to Create a Tax Group
Create tax groups to automatically add the correct rates to all your items.
To get started with creating Taxes navigate to Configuration > Order Adjustments > Taxes.
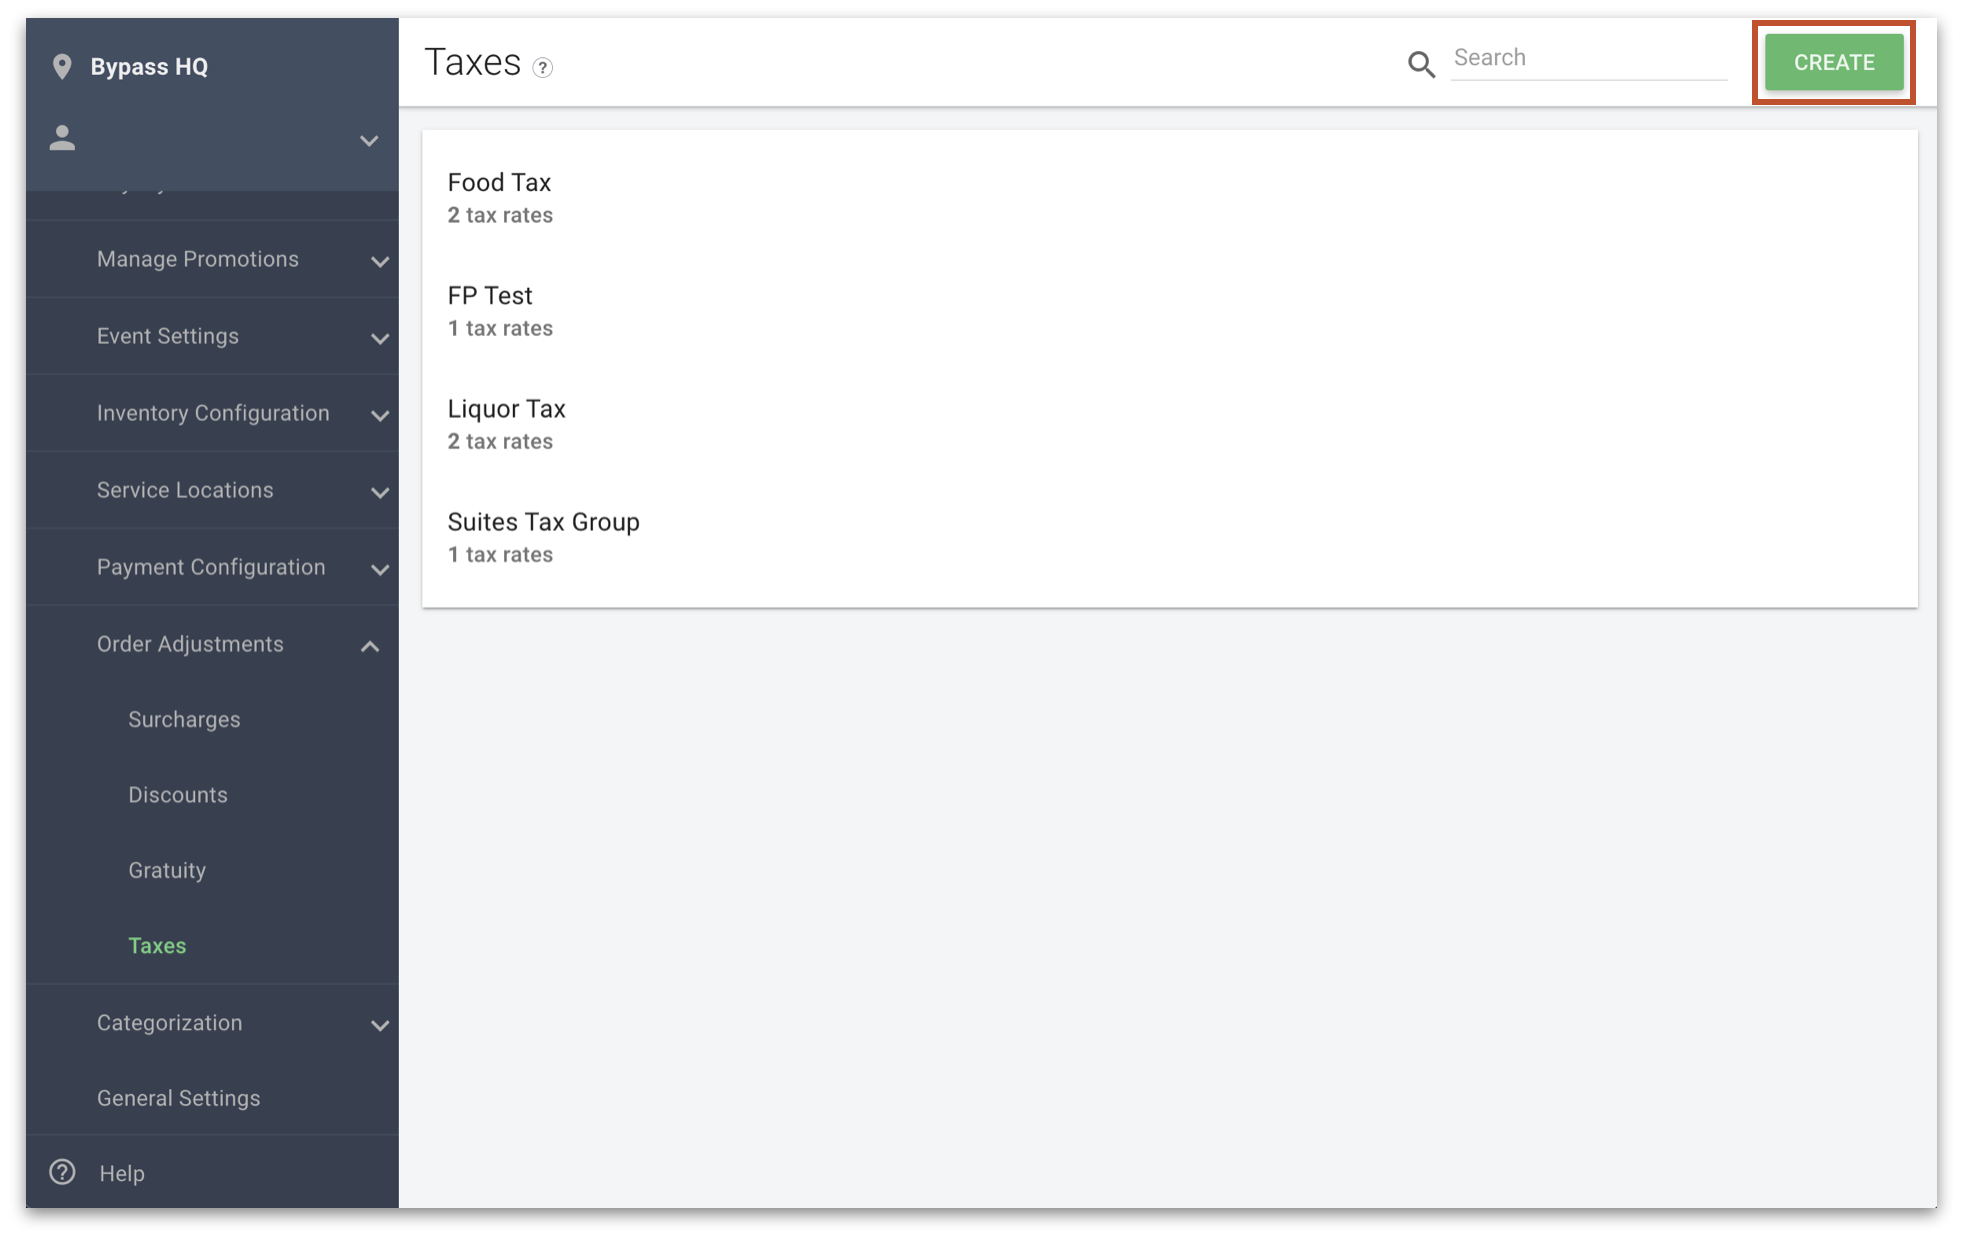
You can create and manage tax groups on this page. Tax Groups are applied to individual menu items that belong to a menu that is tax inclusive. To Create a Tax Group click the New Tax Group button in the top right.
Tax groups have the following information:
- Tax Group Name - The name of the tax group
- Description - A description of the Tax Group
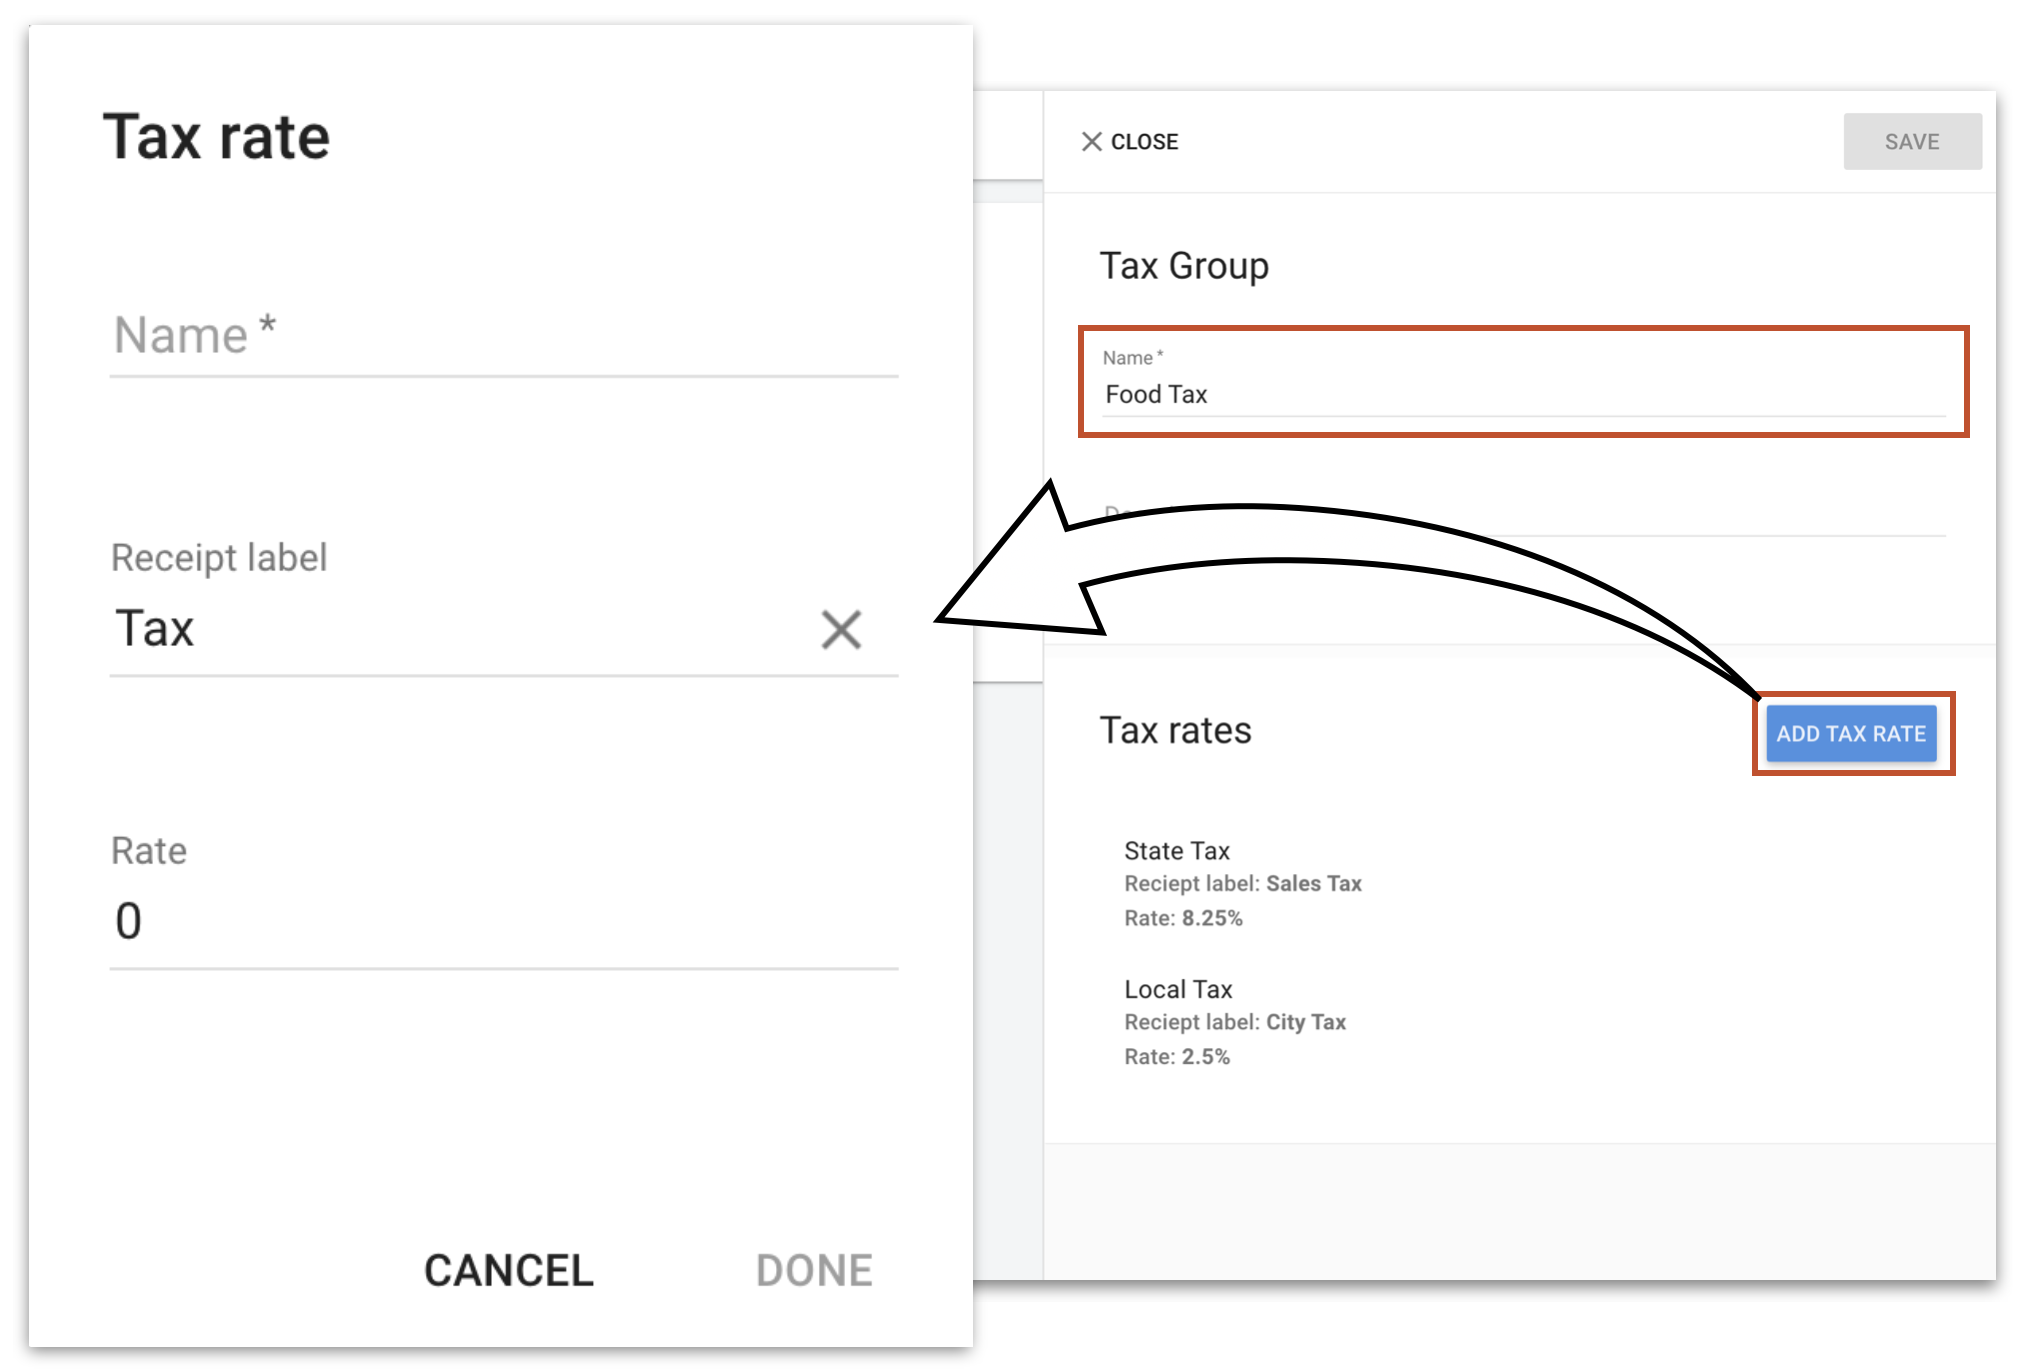
Click Add Tax Rates to:
- Tax Rate Name - The Name of the Tax Rate. The best practice is to use unique names for each Tax Rate. Do not repeat the same Tax Rate name.
- Receipt Label - The name the rate will appear on the receipt
- Rate - The percentage of Tax added to the total
Repeat these steps as needed to add as many Tax rates as you need. You can always delete the Tax Rate by clicking the Delete button.
Assigning a Tax Group to an Item
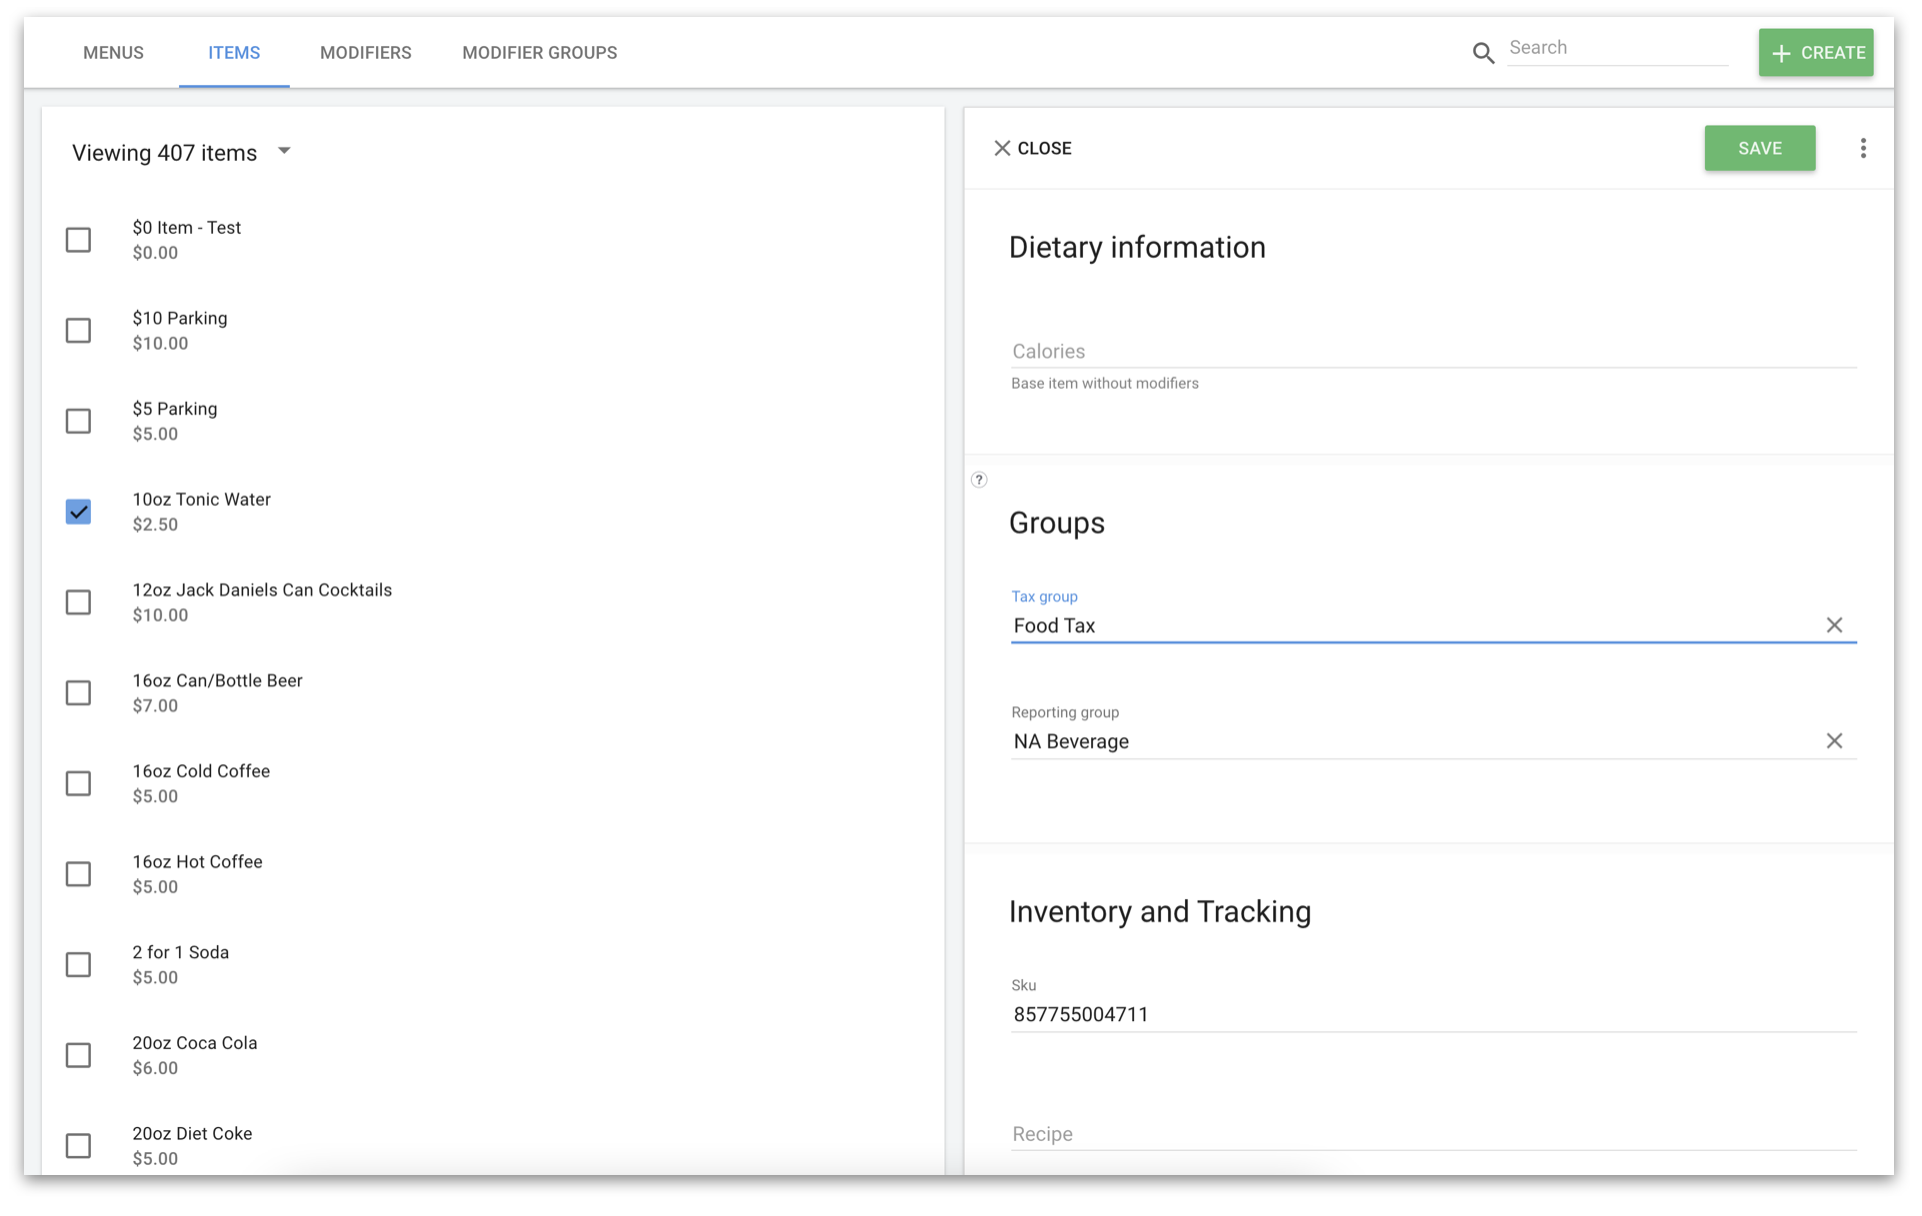
Click the item you want to add a tax group scroll down to Groups.
Click on the Tax group box and type the name of the Tax group.
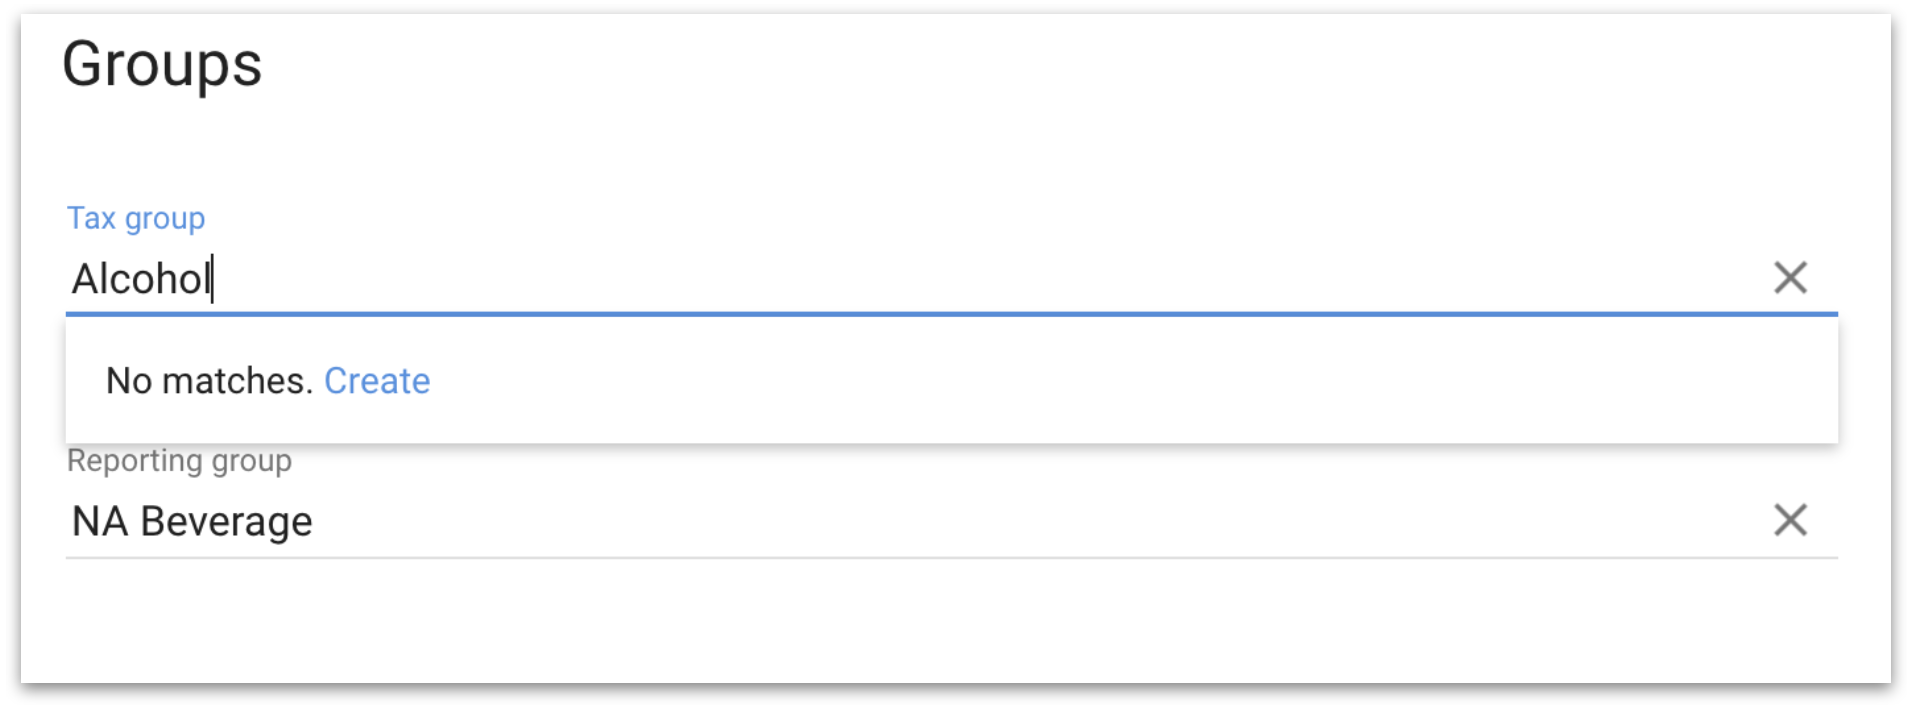
If the Tax group does not exist you will be prompted with a create button.
Mass Assigning Tax Groups
 To mass assign a tax group:
1. Select items by clicking the box next to their name
2. Type the name of the tax group
Tax Exclusive vs. Tax Inclusive Pricing
When creating a new Menu under POS Manager>Menu Manager, you will select whether your prices are Tax Exclusive or Tax Inclusive. Depending on your selection below, the system will apply the tax group (which holds the rates) differently to the menu item.
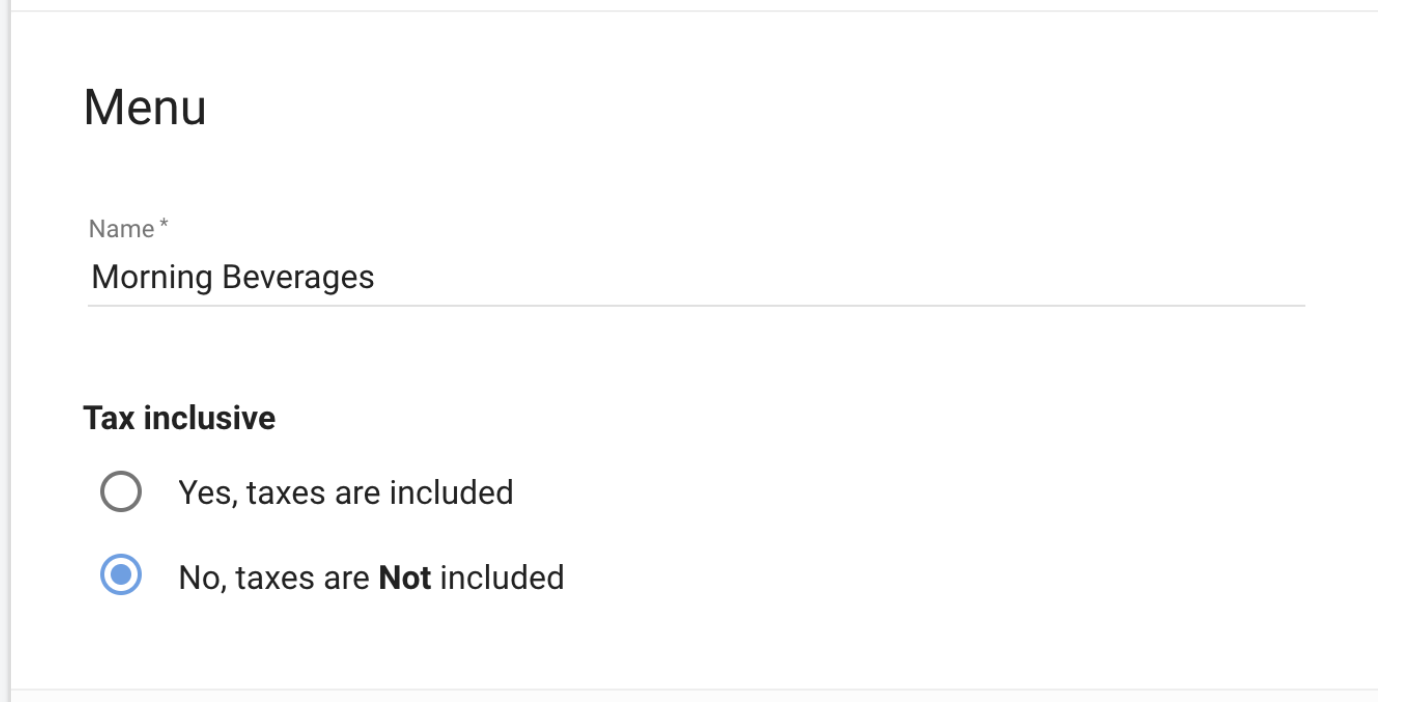
Tax Exclusive Menu - Prices on this type of menu do not include tax. Customers will pay tax as an addition to the menu price and taxes will be applied on the tender screen.
Tax Inclusive Menu: Prices on this type of menu will assume your taxes are included in the menu price, meaning, there will be no additional charge to customers for taxes outside of the listed menu price. Please see example above.
Tax Inclusive (continued) - Manager system will automatically adjust your menu price to properly reduce your menu price (to adjust for your tax rate), calculate taxes, and sum those to equal your listed menu price.