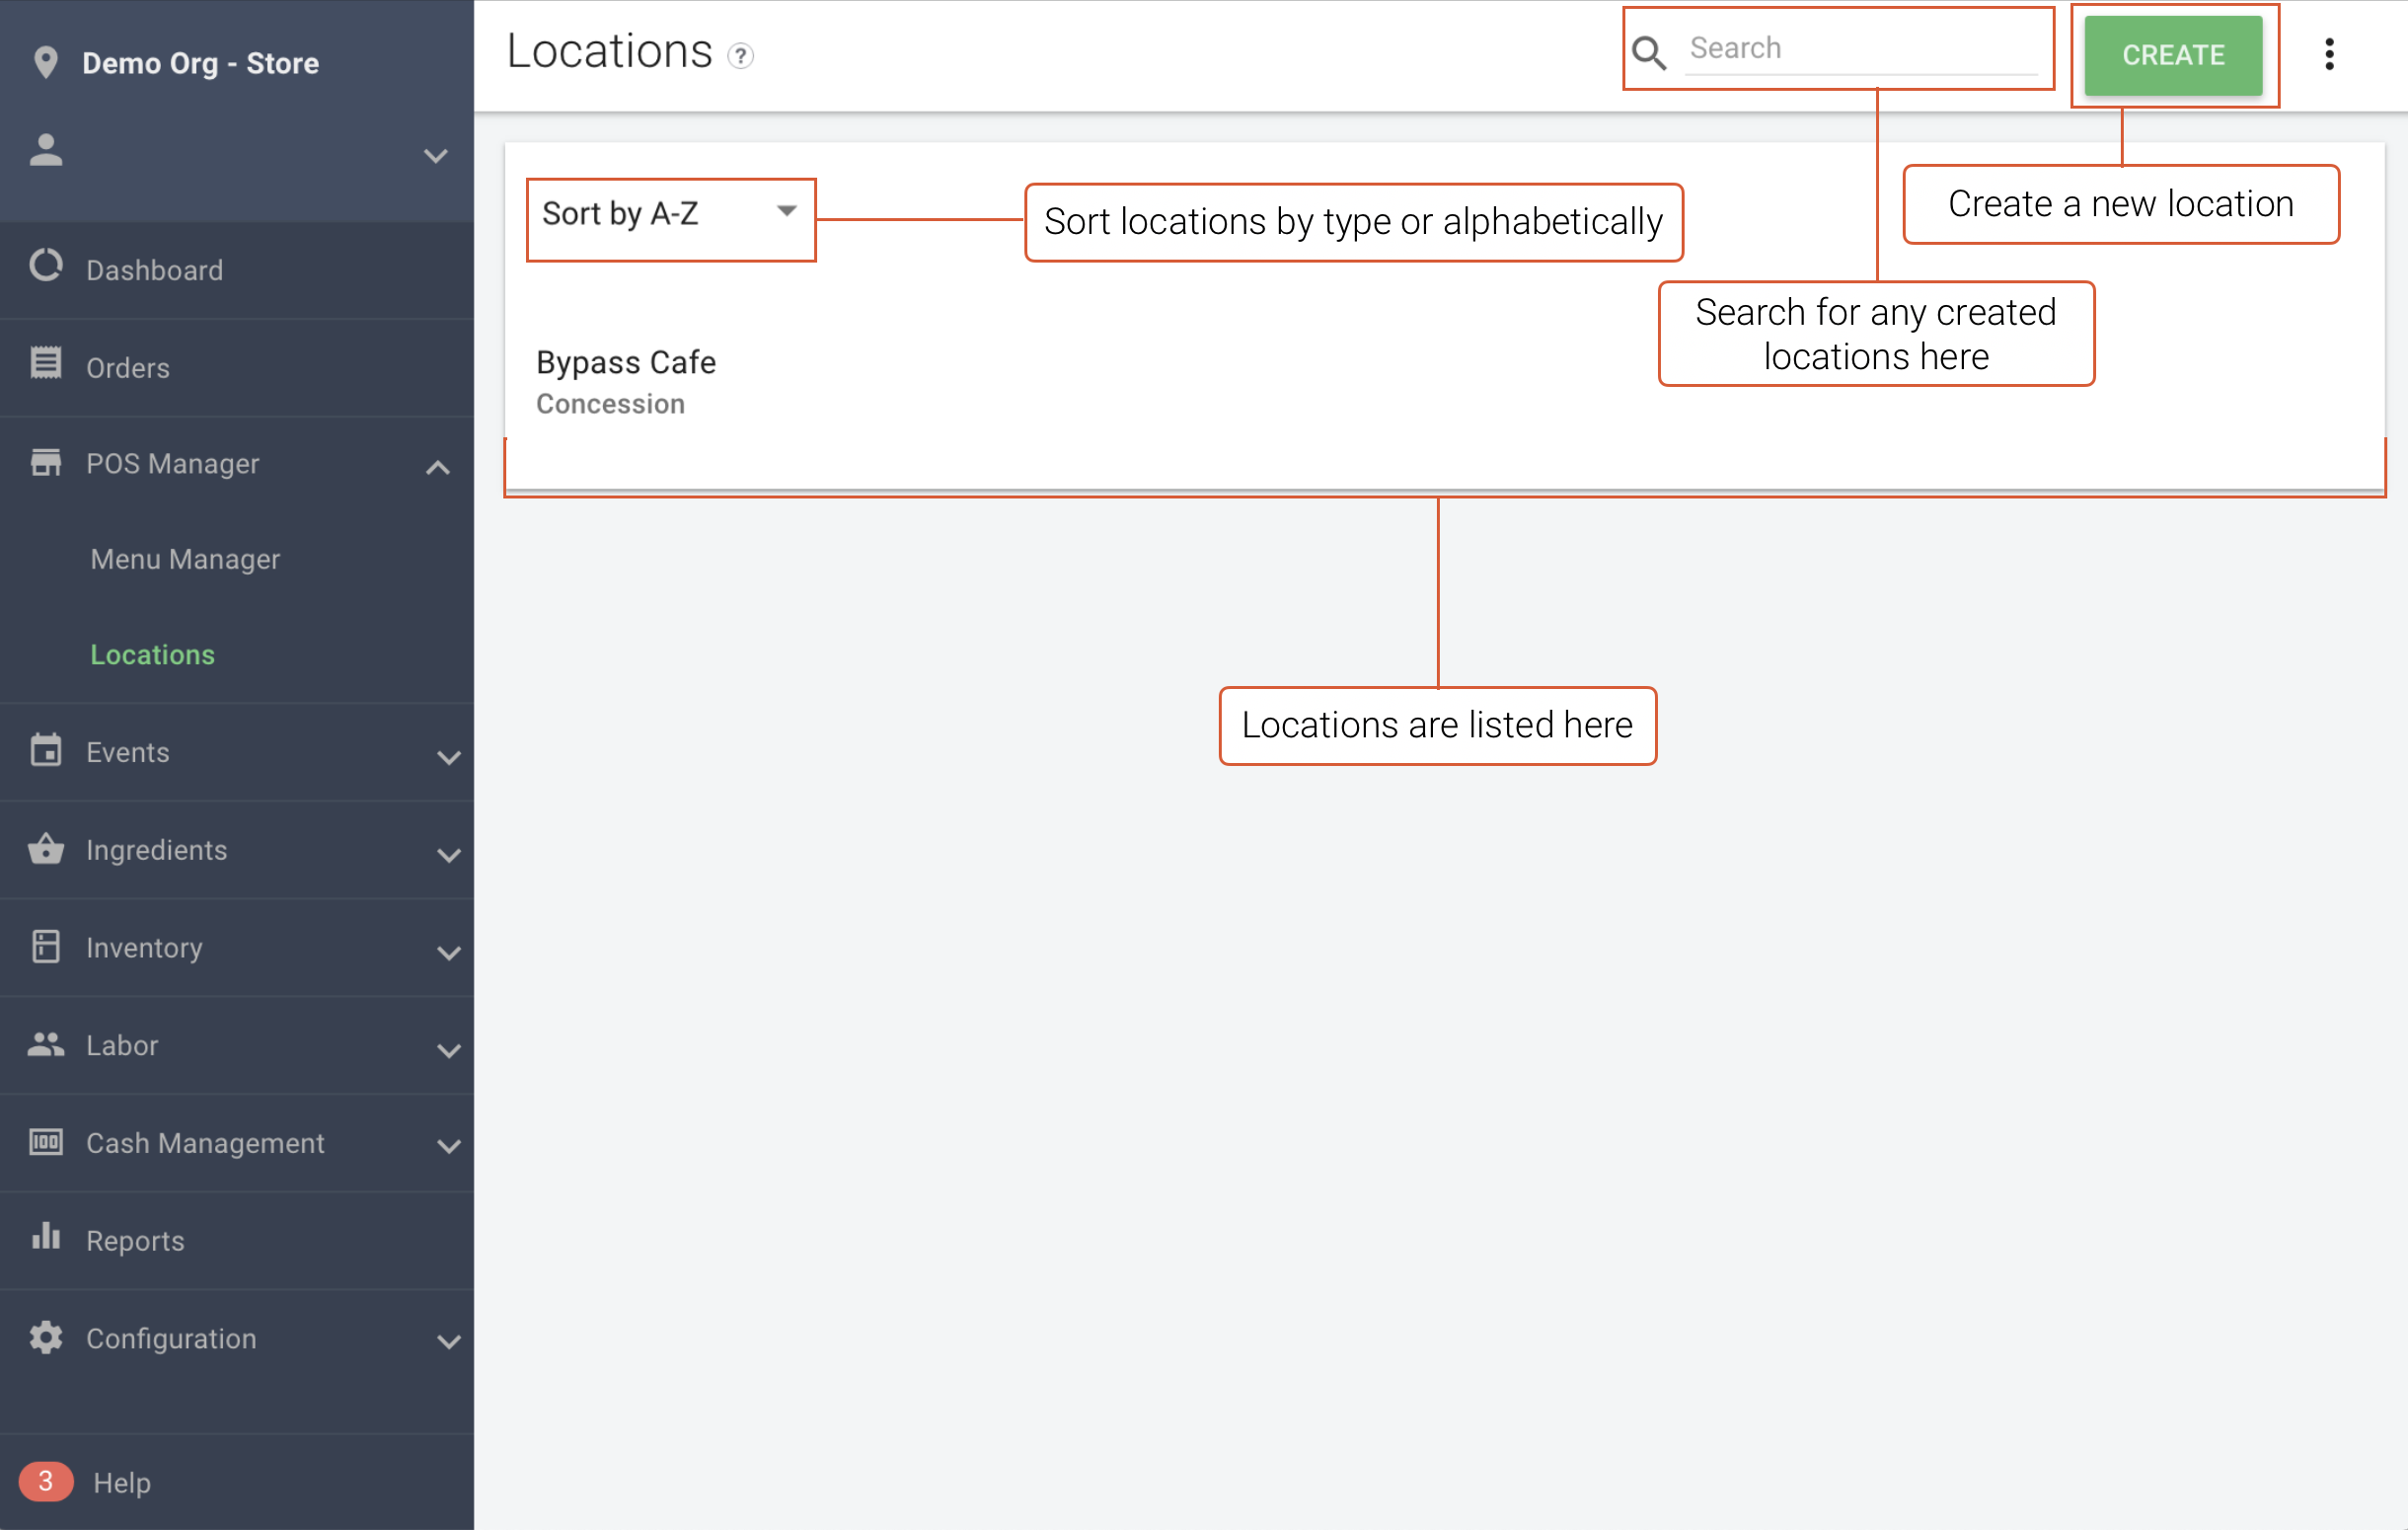
Locations are the top level of item organization. The register is attached to the Location, via the Default Location setting, and controls how that register accepts payments, prints receipts, and more. Navigate to POS Manager > Locations to follow along.
Table of Contents
Overview
Here you will create and manage settings that will control how your register will behave. Locations will control gratuity, discounts, payment options, and more, therefore it is important to consider how many Locations you will need. Below is an illustration of the relationship between Locations, Menus, and Items.
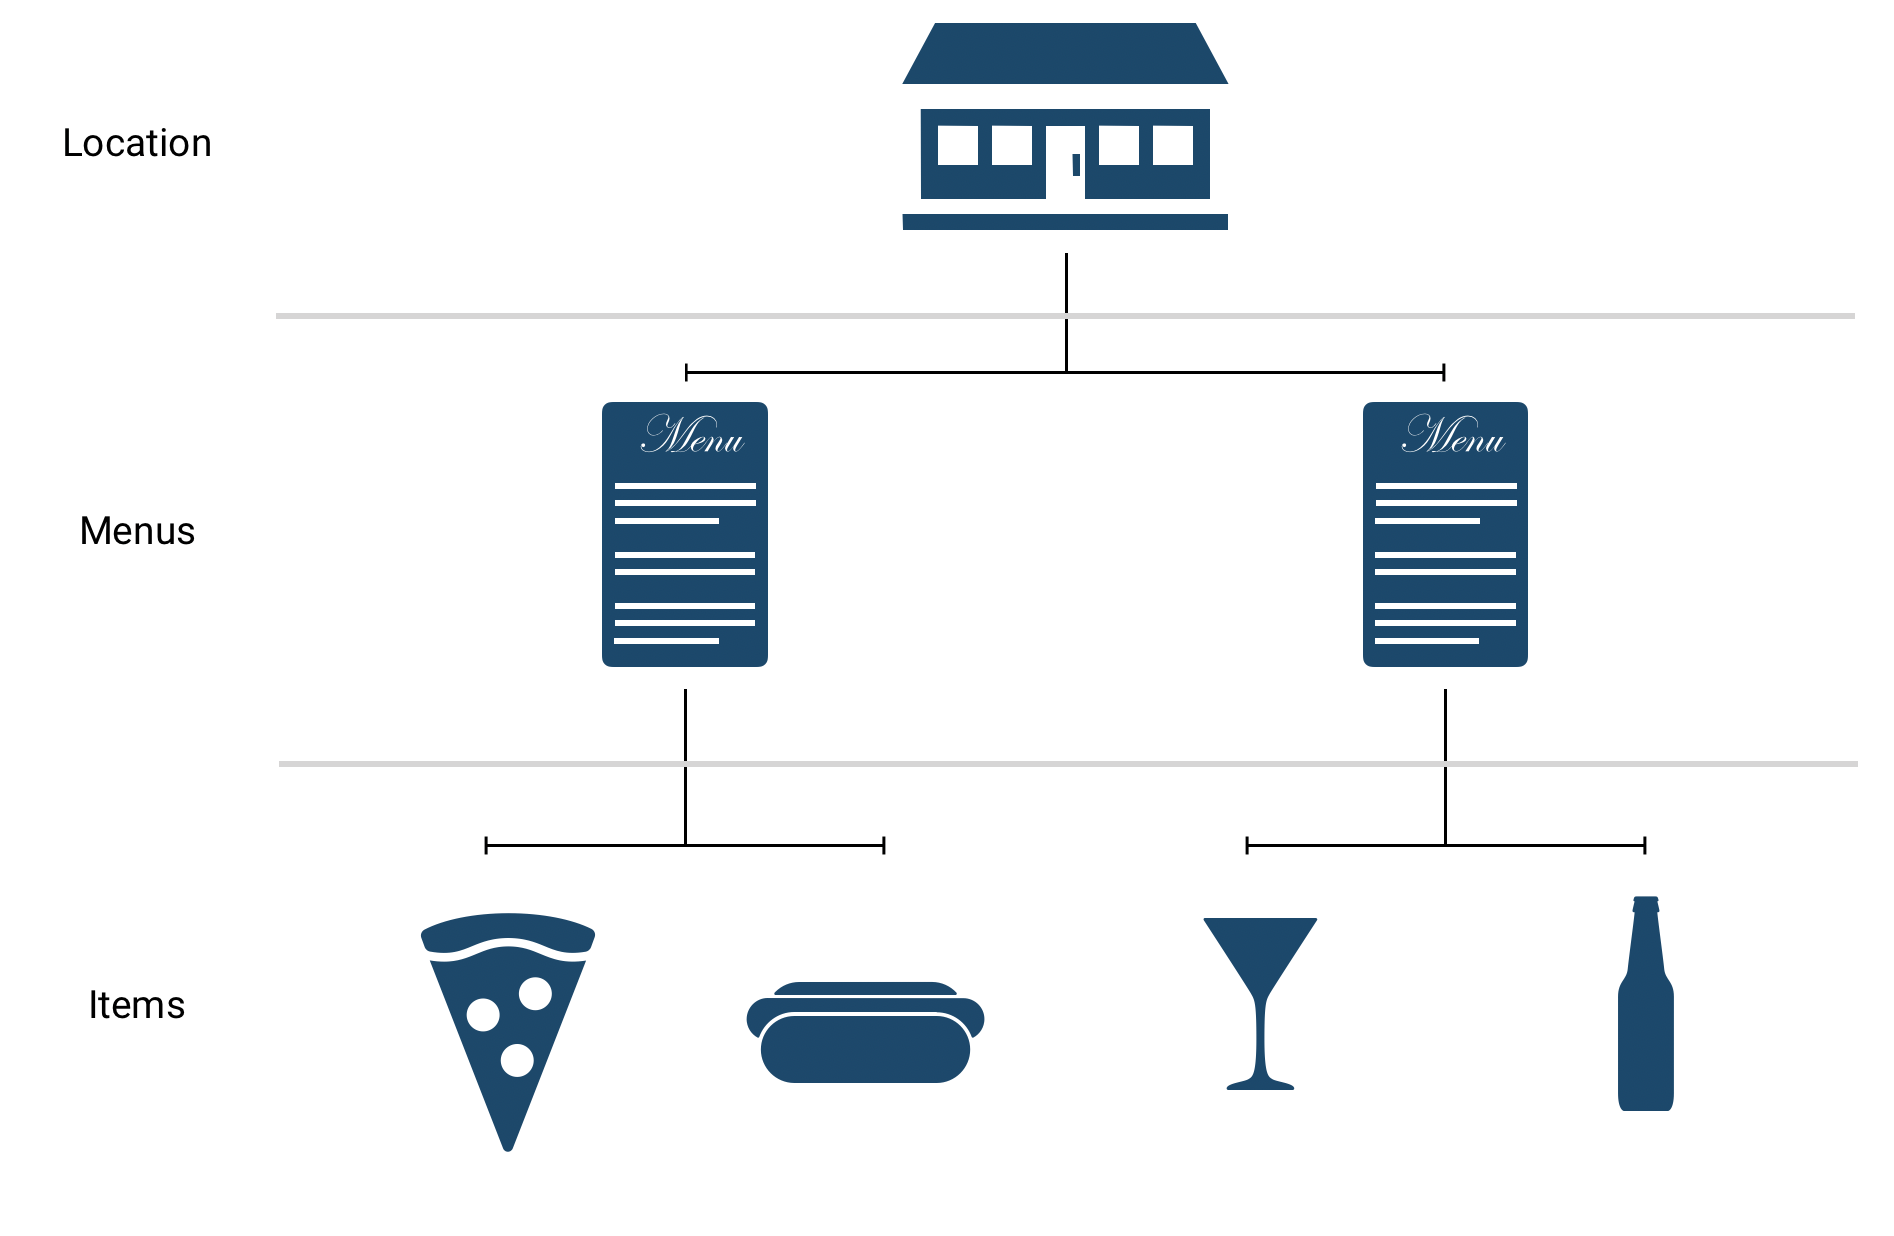
Locations are the top level of item organization, they can hold multiple menus.
Menus hold Items. In this example, we have one Menu for drinks and one Menu for food.
Items are representations of Menu Items that can be sold.
Location Creation
When you click Create, a location details page opens on the right. The fields are as follows:
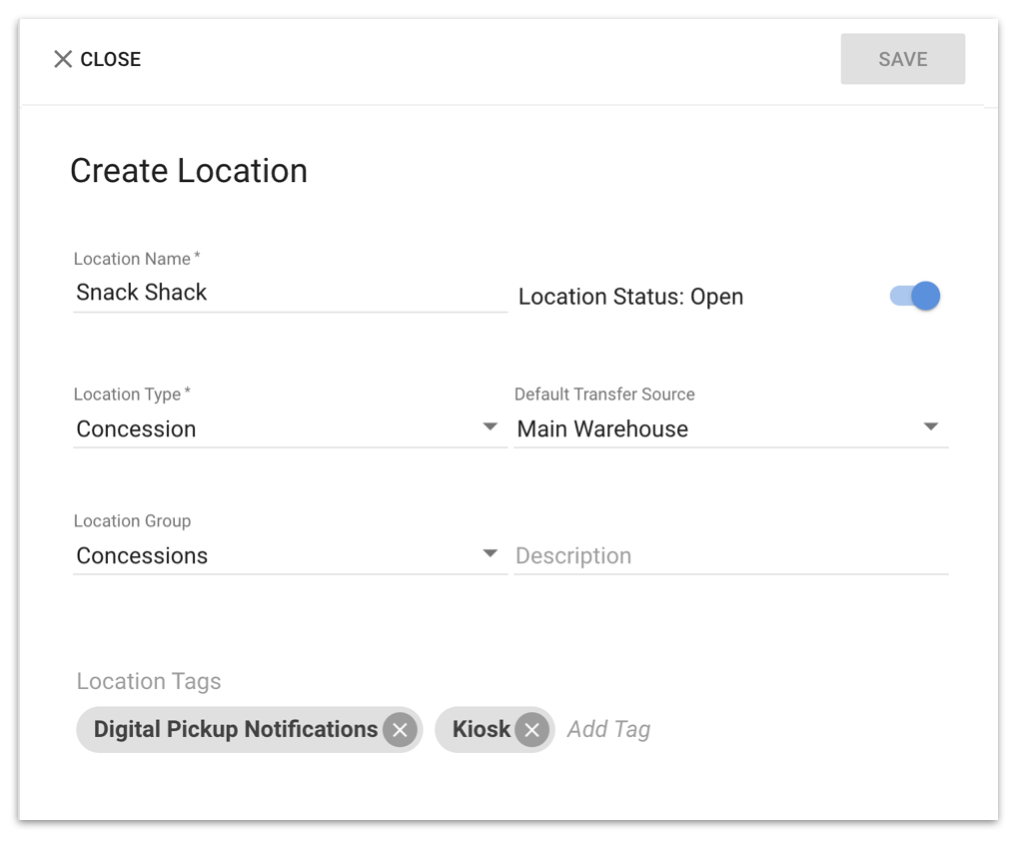
- Location Name (Required) - The name the Location will be listed as in Manager and on the register.
- Location Status - Toggle this Location on for Open and off for Closed.
- Location Type (Required) - Controls what features are available to this Location.
- Default Transfer Source (Optional)- Used for Inventory Transfers from a warehouse, this option chooses a default warehouse. Anytime you build a transfer, this Location will assume this transfer source.
- Location Group (Optional)- Attaches a Location Group to this Location. Any Locations in this Location Group will show up in the Location Group's report.
- Description (Optional) - Short description of the current Location. Can be left blank.
- Location Tags (Optional)- This applies a filter that affects the search bar on top of the Locations page. Note: For venues using Standsheets, you can use Location Tags to print certain groups of Standsheets. For example, for Section 300 you can tag it as Section 300 so you can print a Standsheet with only that selected Location.
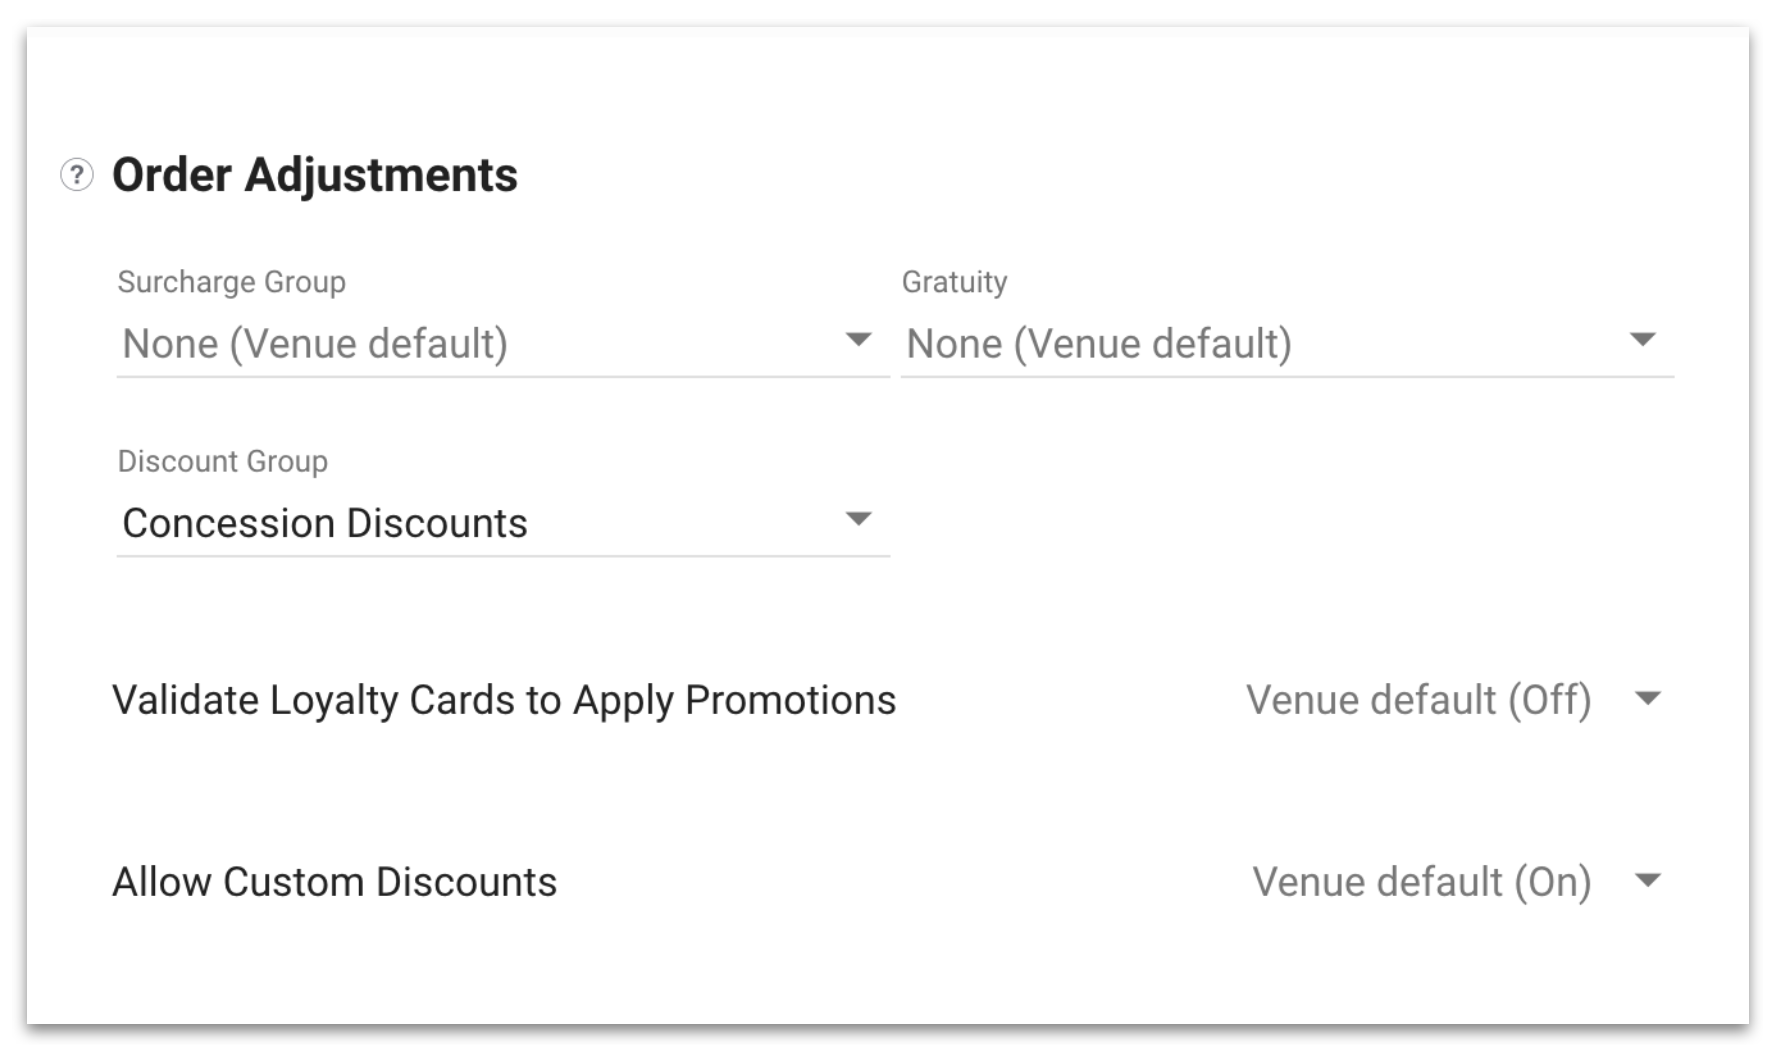
Order Adjustments
- Surcharge Group - Commonly multiple fees automatically applied to every order. Most commonly used in Suites and Premium areas. You can create Surcharges under Configuration > Order Adjustments > Surcharges.
- Gratuity - Type of adjustment for the amount of money given to a person or group who has performed service at a venue. You can create gratuities under Configuration > Order Adjustments > Gratuity.
- Discount Group - Discounts can be made available on the register screen if you attach a Discount Group. You can create a Discount Group under Configuration > Order Adjustments > Gratuity.
- Validate Loyalty Cards to Apply Promotions - If your business uses any Loyalty program integration, you must enable this feature.
- Allow Custom Discounts - Enables the Custom Discount button. When pressed, a number pad will appear and the Employee will key in the Discount amount.
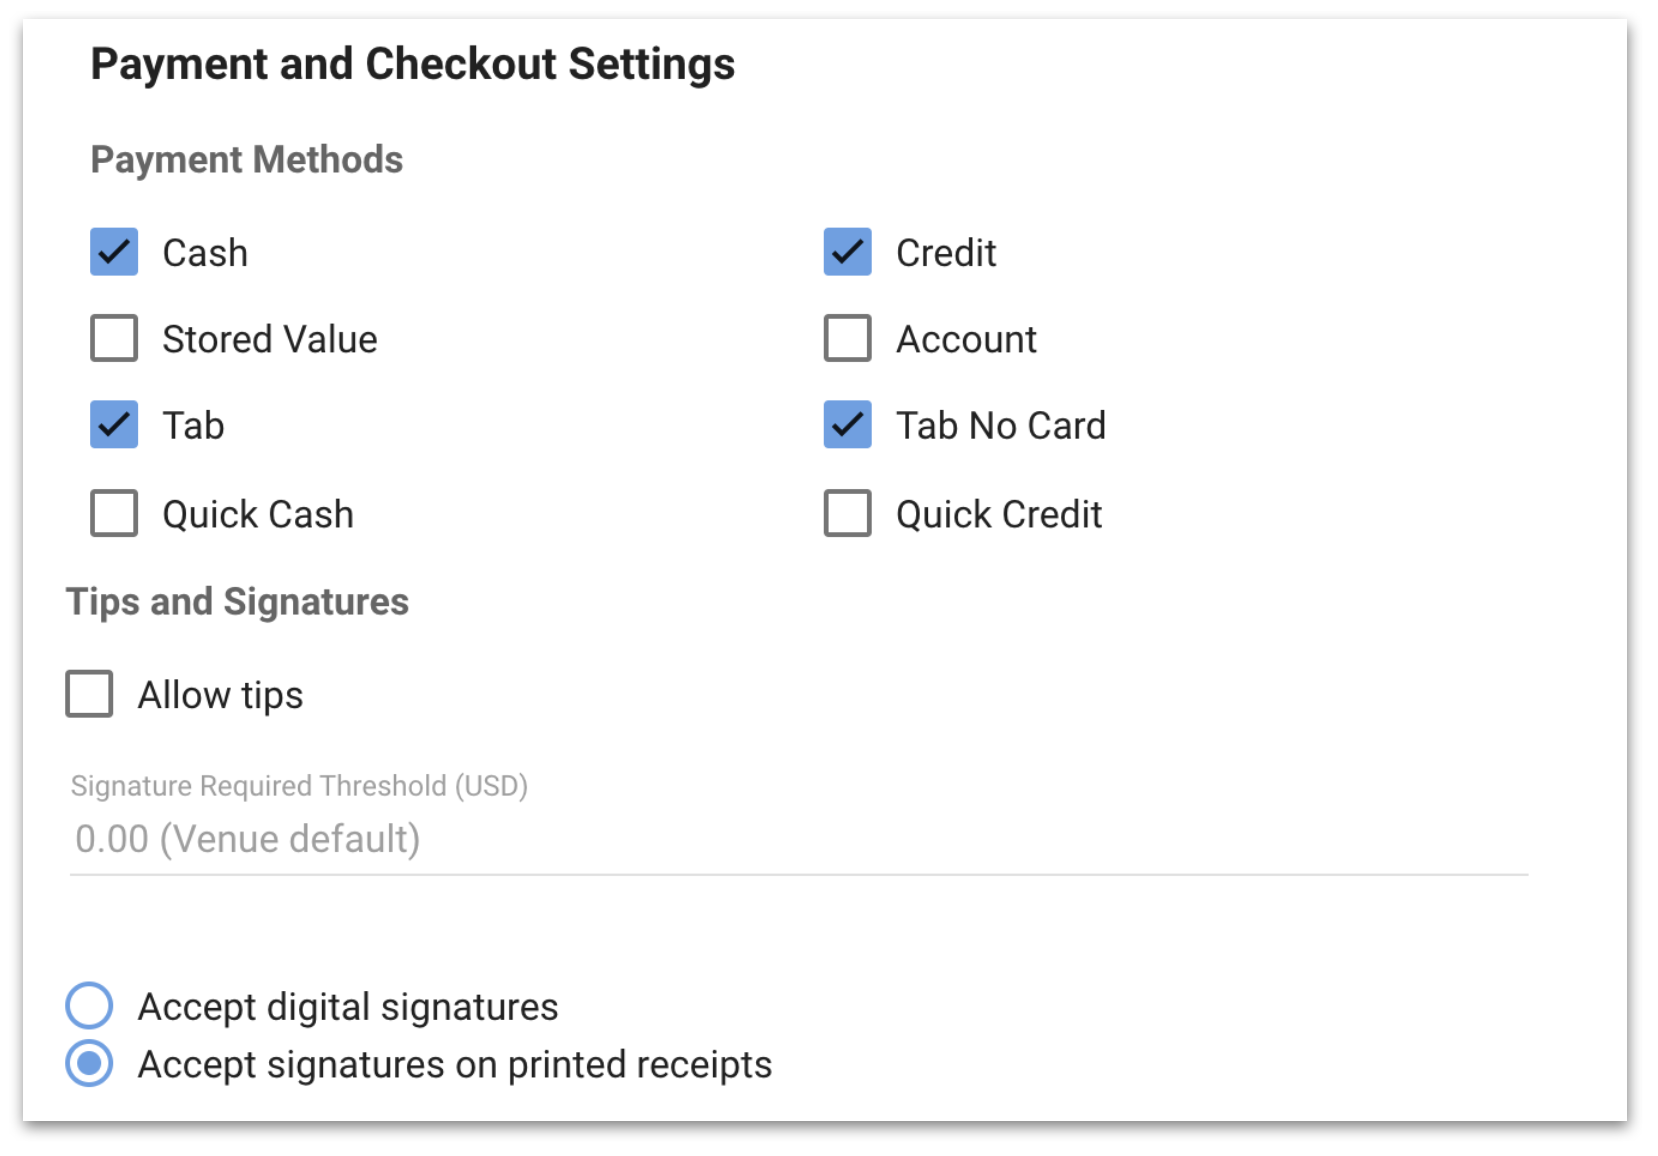
Payment and Checkout Settings
Payment and Checkout Settings will configure what payments show up on the register screen at checkout. To edit your different payment options, log in to Manager then Configuration > Payment Configuration.
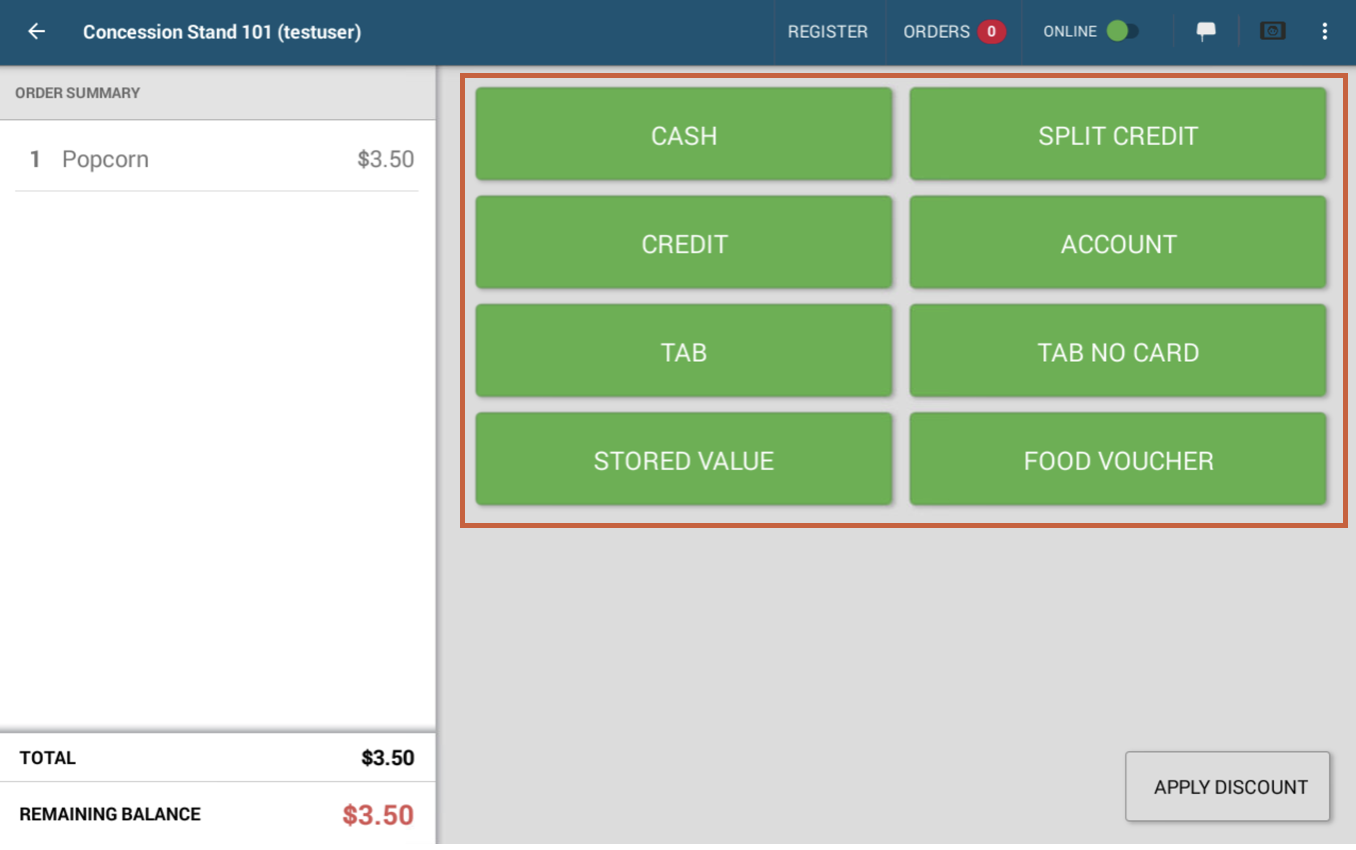
Payment settings set up in Manager will appear on the register screen like the image below.
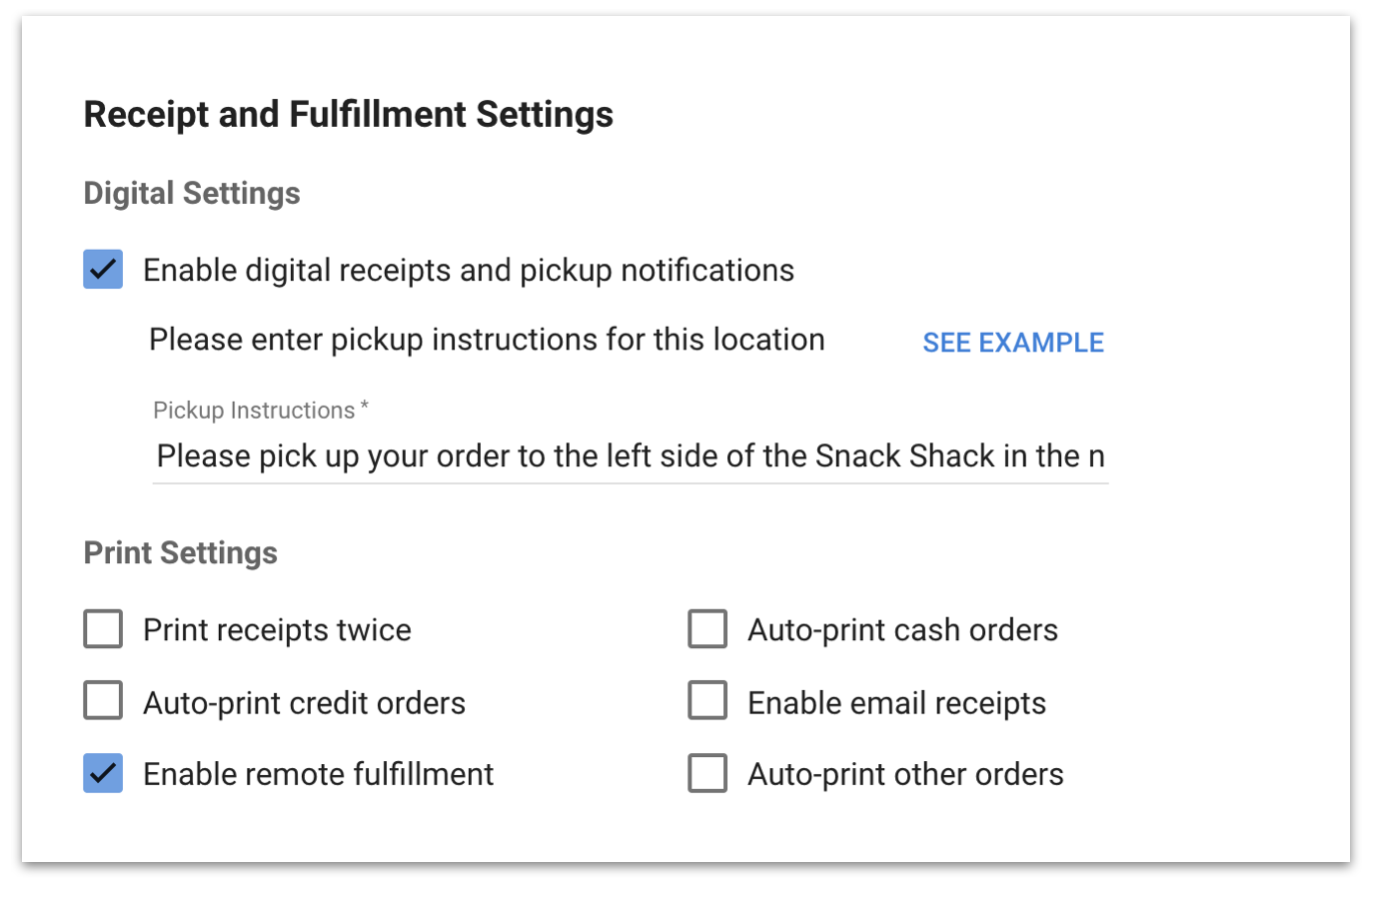
Receipt and Fulfilment Settings
Enabling Pickup Notifications allows you to let customers know when their order is ready.
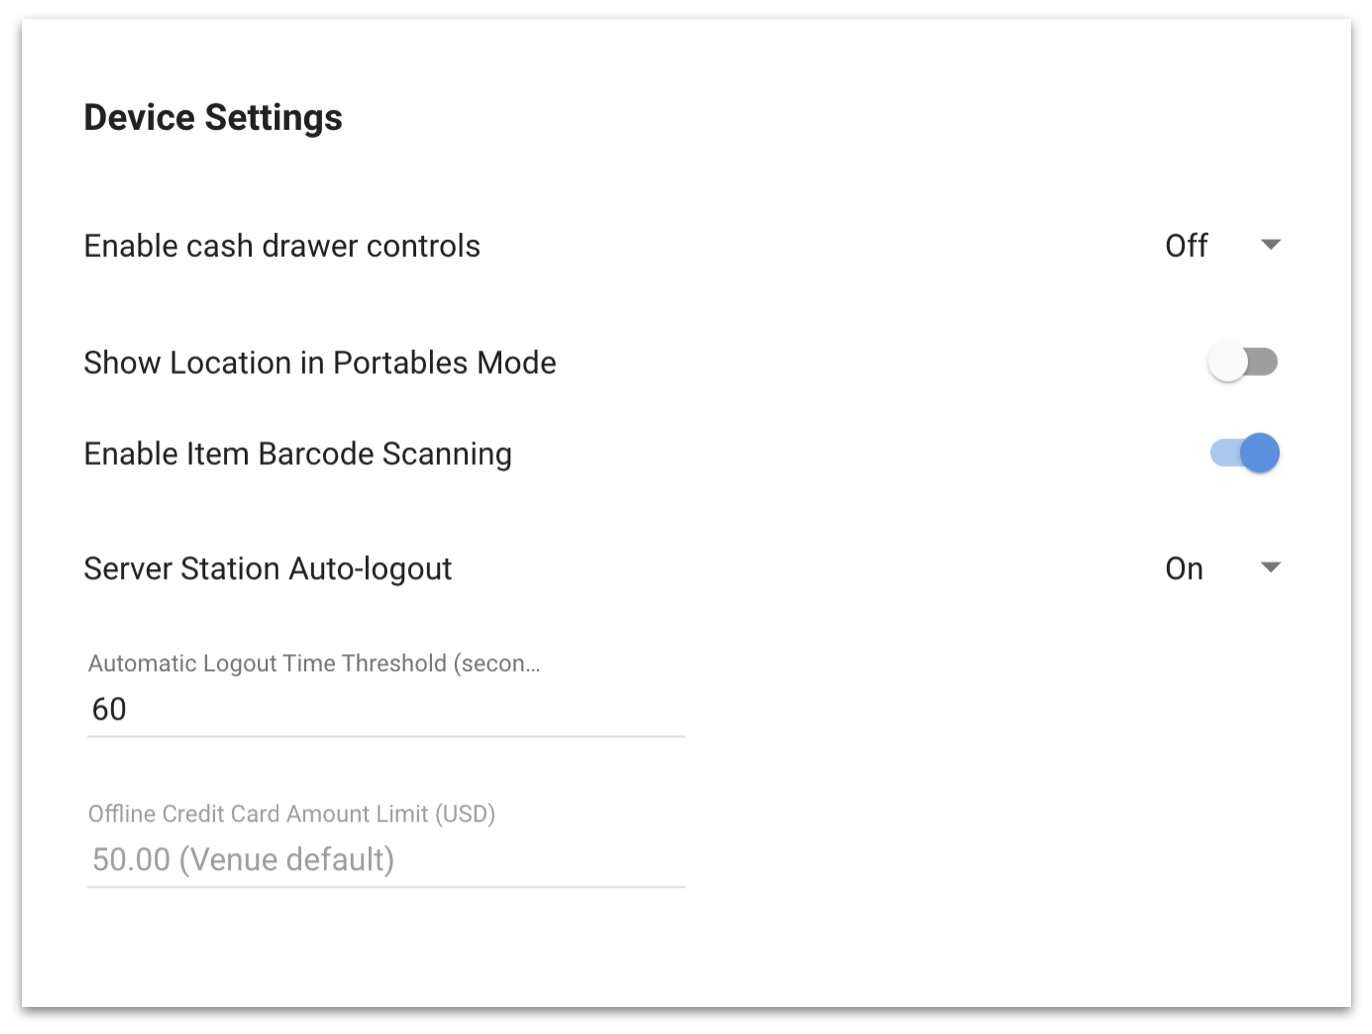
Device Settings
- Enable cash drawer controls - Prevents cashier from performing another transaction while the cash drawer is open.
- Show Location in Portables Mode - Allows Location to be logged into a portable device.
- Enable Item Barcode Scanning - Allows barcodes to be scanned.
- Server Station Auto-logout - If toggled on, the register will automatically log off after a certain period of inactivity.
- Automatic Logout Time Threshold - The amount of time of inactivity before the app logs out.
- Offline Credit Card Amount Limit - The maximum credit card amount allowed to be taken when the register is offline.
- Signature Required Threshold - Minimum dollar amount spent to require a signature.
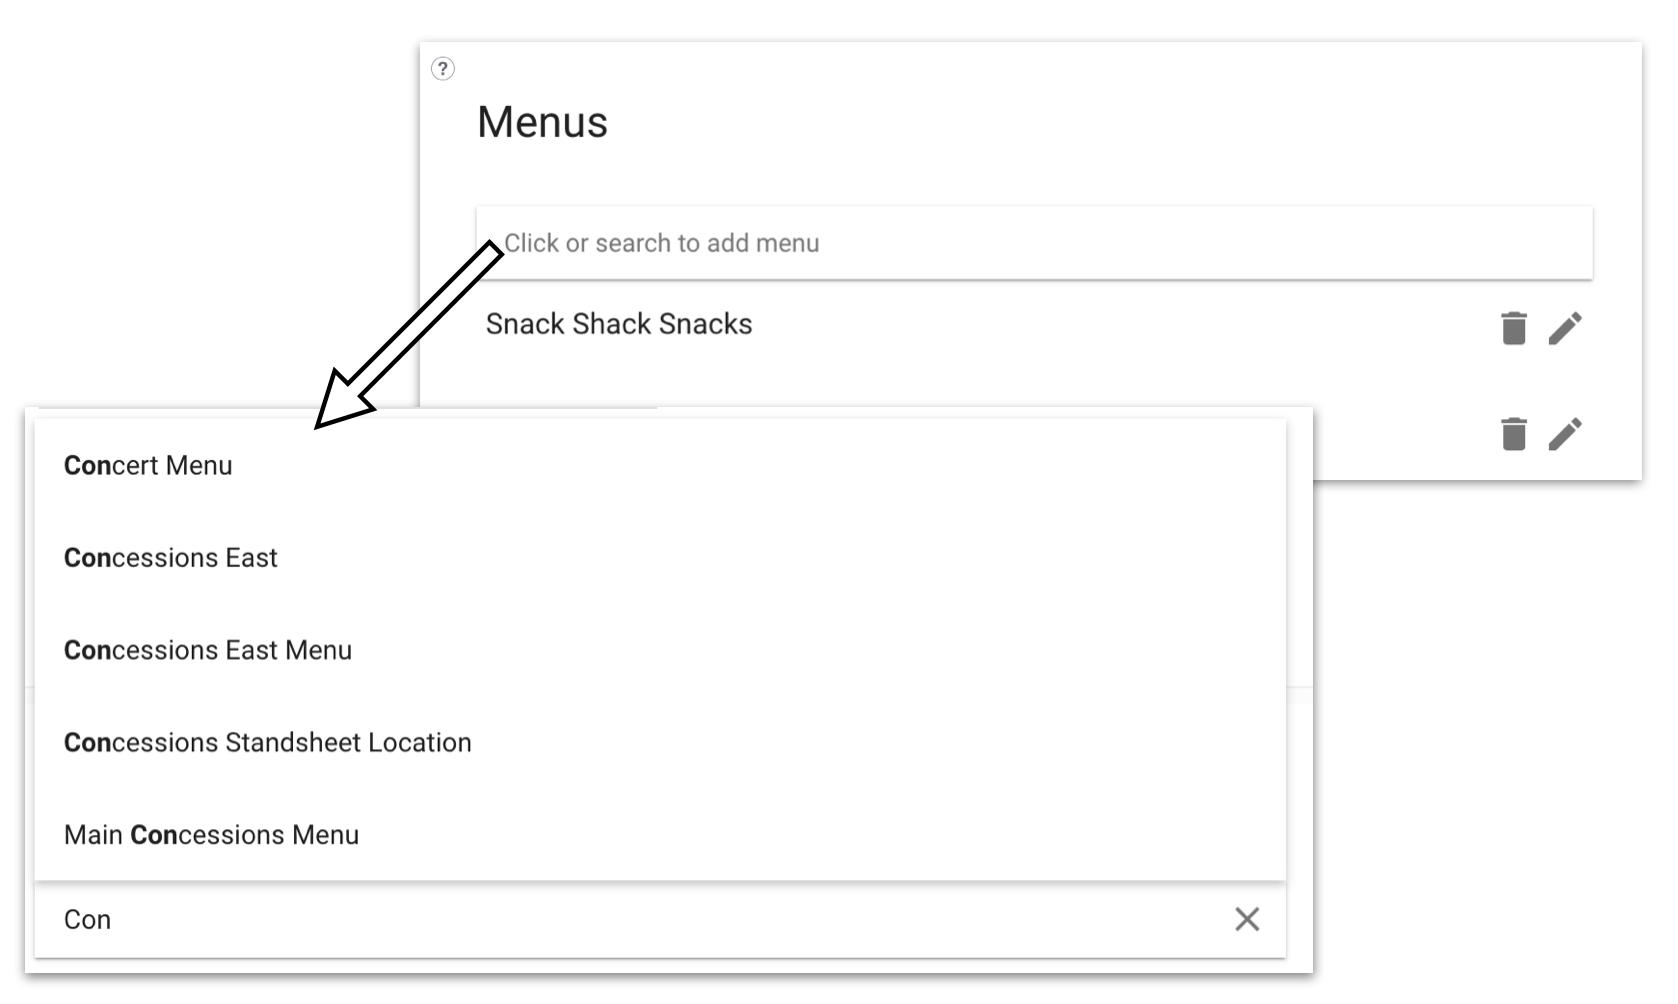
- Menus - For Items to show on the register, the Location must have a Menu attached. To attach a Menu, click the drop-down and select the desired Menu(s).
Menus
At the bottom of the Locations Edit panel is the Menus section. Here you can see connected Menus or add additional Menus. You can also edit Menus by clicking on the pencil icon to the right of any attached menu.
You can also edit Menu Items inside of the Locations edit panel. Note: if you edit a Menu here it will affect all Locations with that Menu.

For more information on creating Menus, click here.