
Reporting Groups allow you to curate more detailed information about groups of similar items. Using Reporting Groups, you can see what items are doing well and which ones might need help. We recommend building your reporting groups before you create your items. This guide will show you how to create reporting groups, attach them to items, and view these reports.
Table of Contents
- How to Create Reporting Groups
- How to attach a Reporting Group to an Item
- How to View Reporting Group Data
How to Create Reporting Groups
To start creating Reporting Groups navigate to Configuration > Catergoization > Reporting Groups.
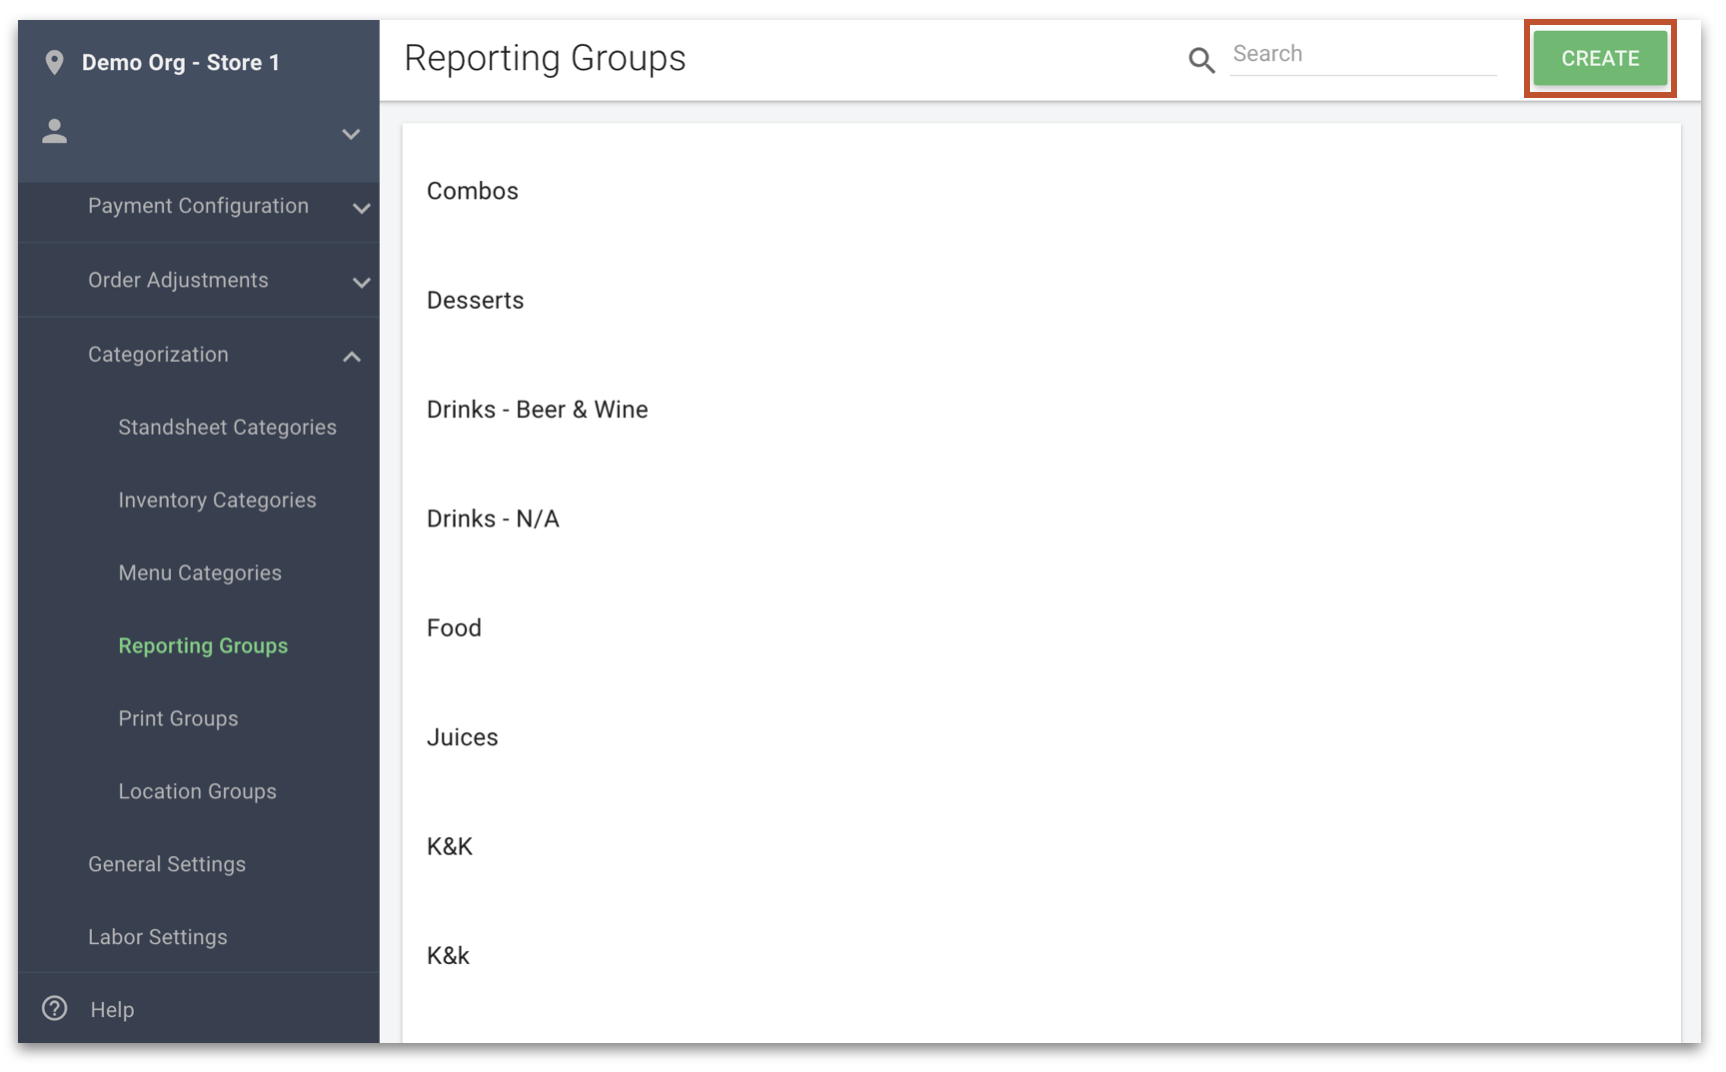
1. Click Create in the top right.
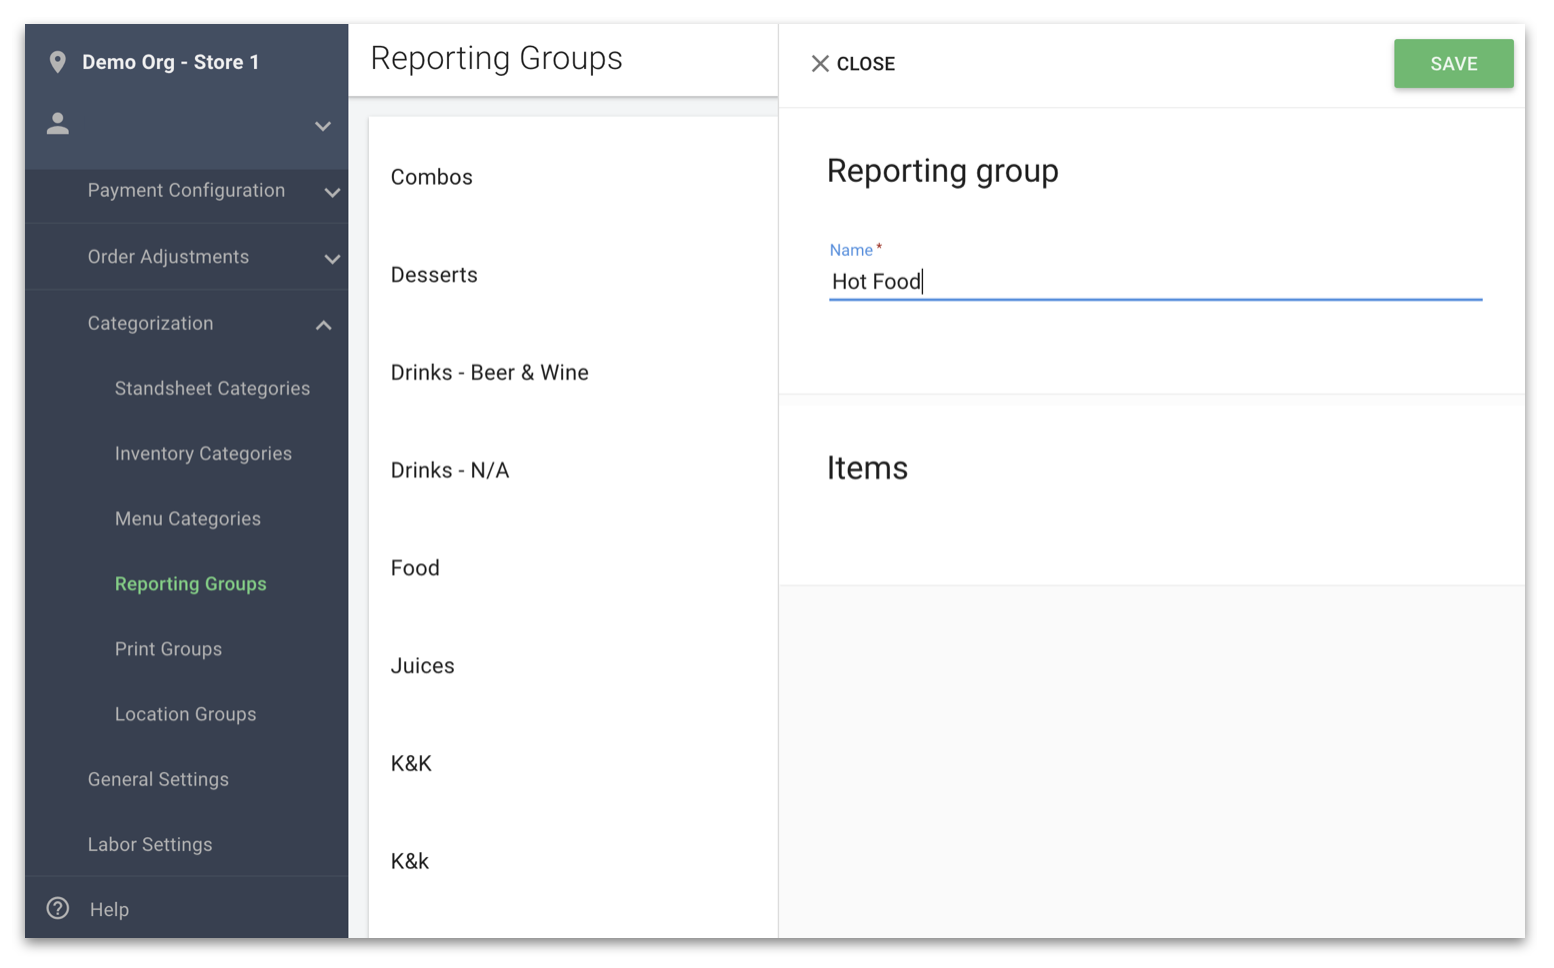
2. In the side panel that opens up type a name in the Name field. This will be the name that will show up in the Reporting section.
3. Click Save in the top right. Note that once you save you cannot change the name.
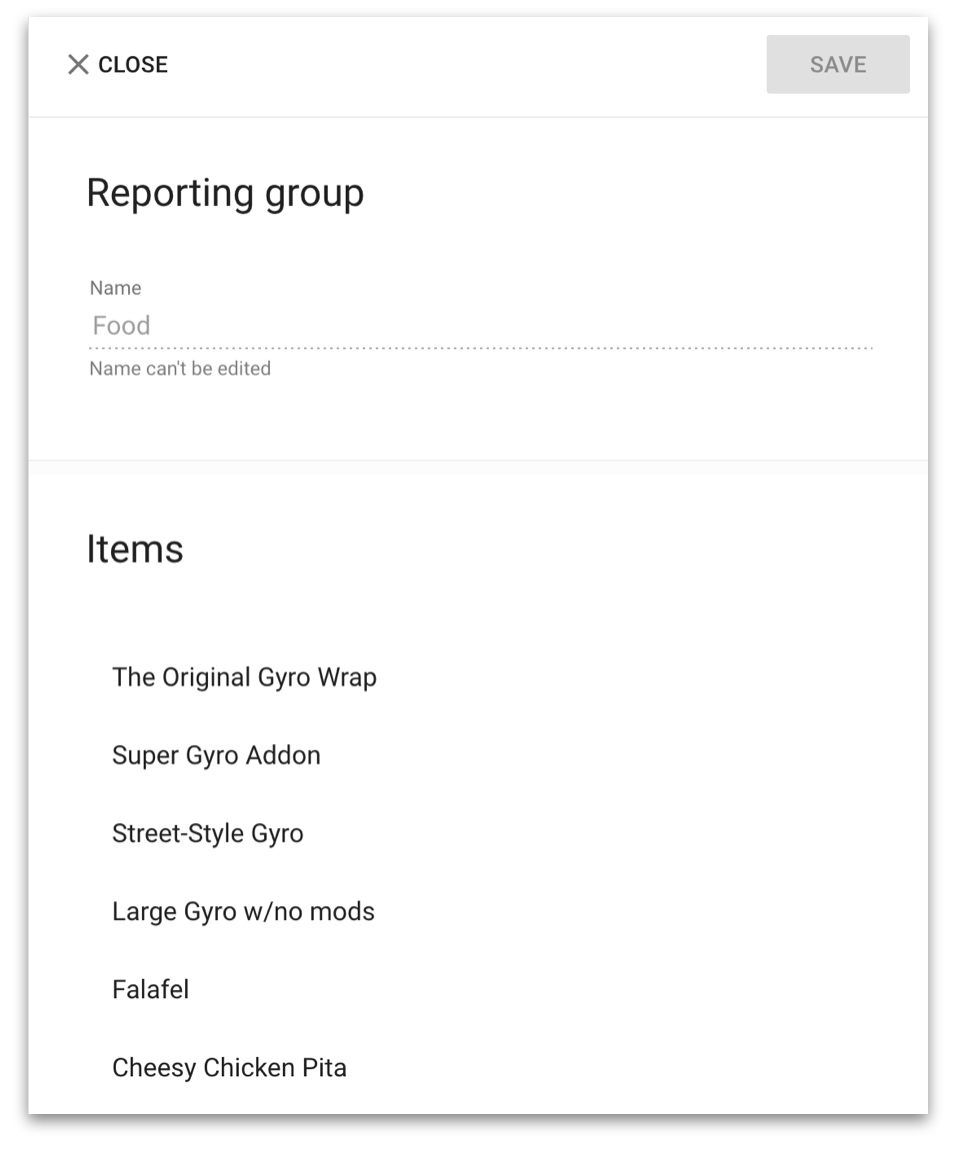
When clicking on an existing Reporting Group you will see any associated items.
How to attach a Reporting Group to an Item
You can add a Reporting group to new or existing non-enterprise items. To attach a Reporting Group to an Item navigate to POS Manager > Menu Manager.
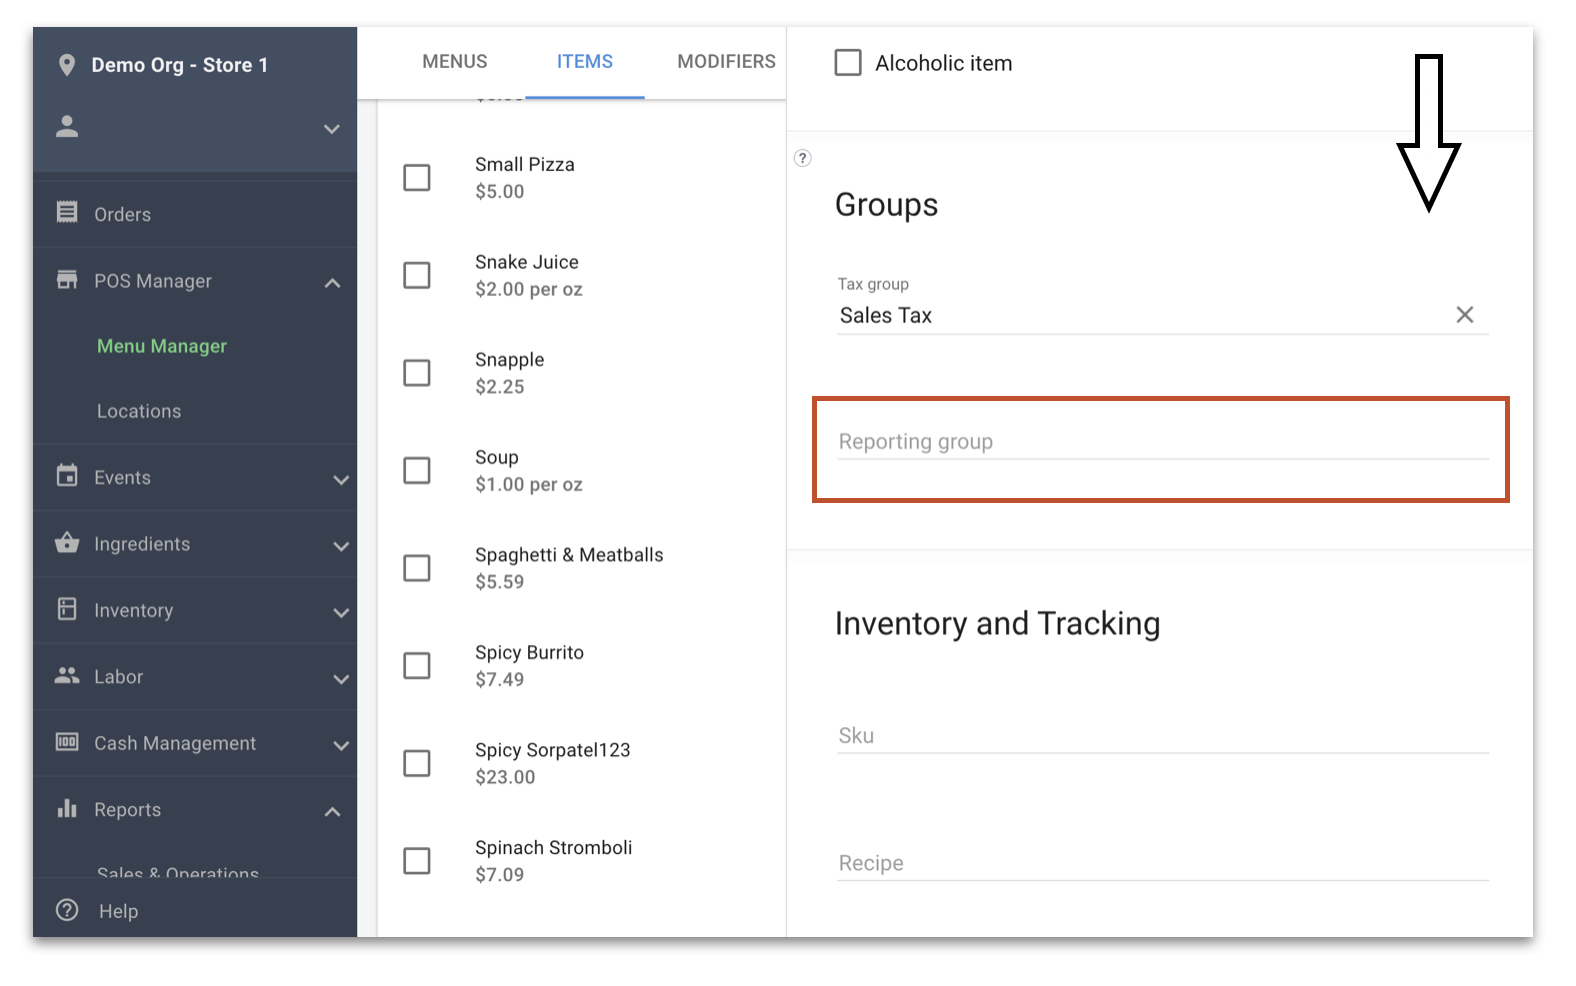
1. When looking at an item's details, scroll down to the Groups section.
2. Click the Reporting Groups field.
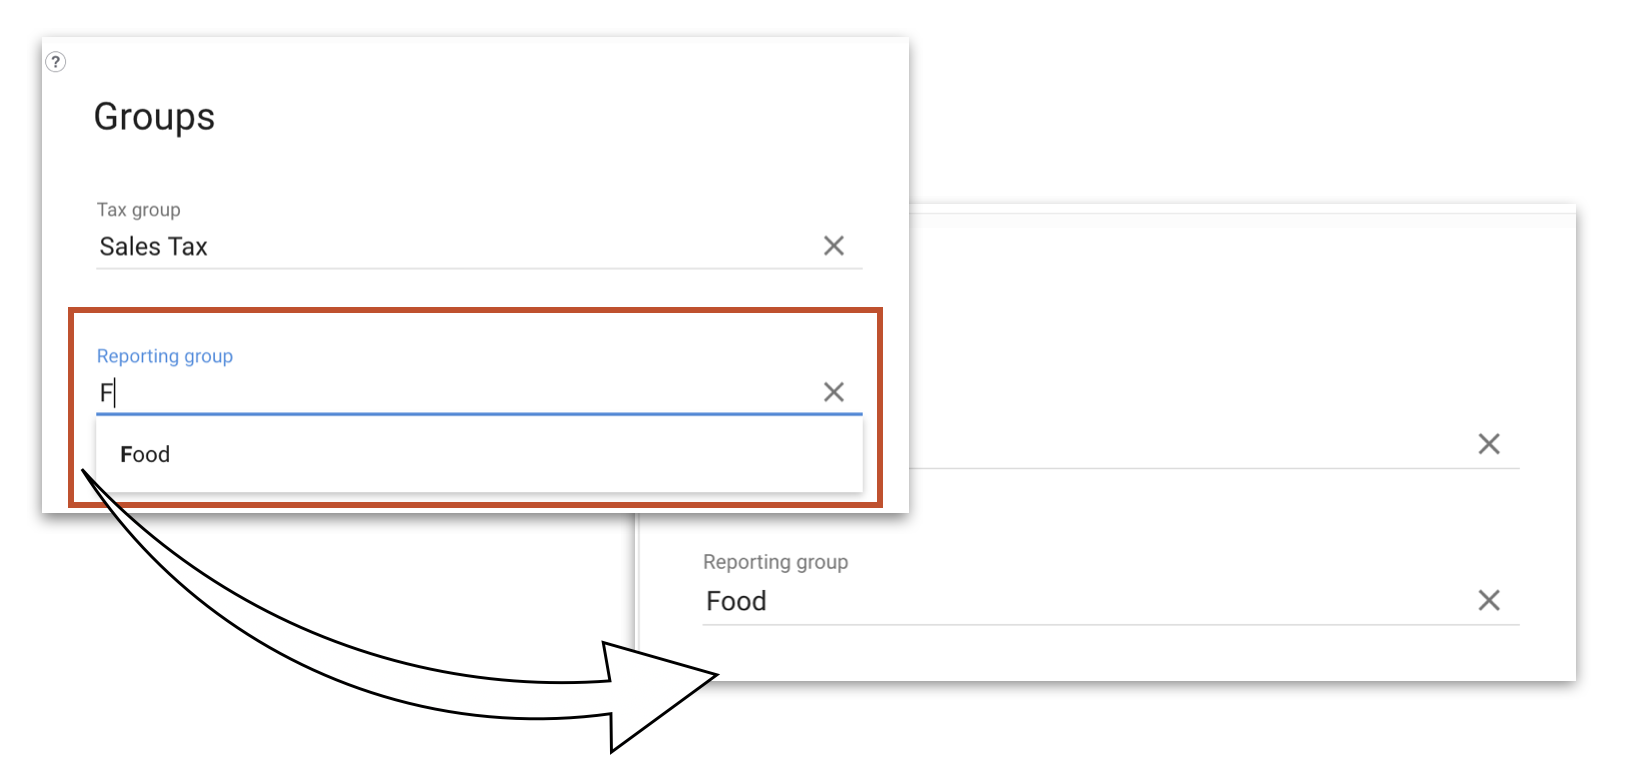
3. Type the name of the group you want in the Reporting Group field. Any existing Reporting Groups will appear as you type. Click on one to assign it to this item.
4. When finished, click Save.
Note: Editing an Item's Reporting Group If you change an item's reporting group the all associated reports will be retroactively changed. So if you move an Item from the Food group to the Hot Food group then all dynamic reports will show those two totals as having been adjusted.
How to View Reporting Group Data
The reports available to you will depend on if your business is a daily operator or an event-based operator.
Daily Operator Reports
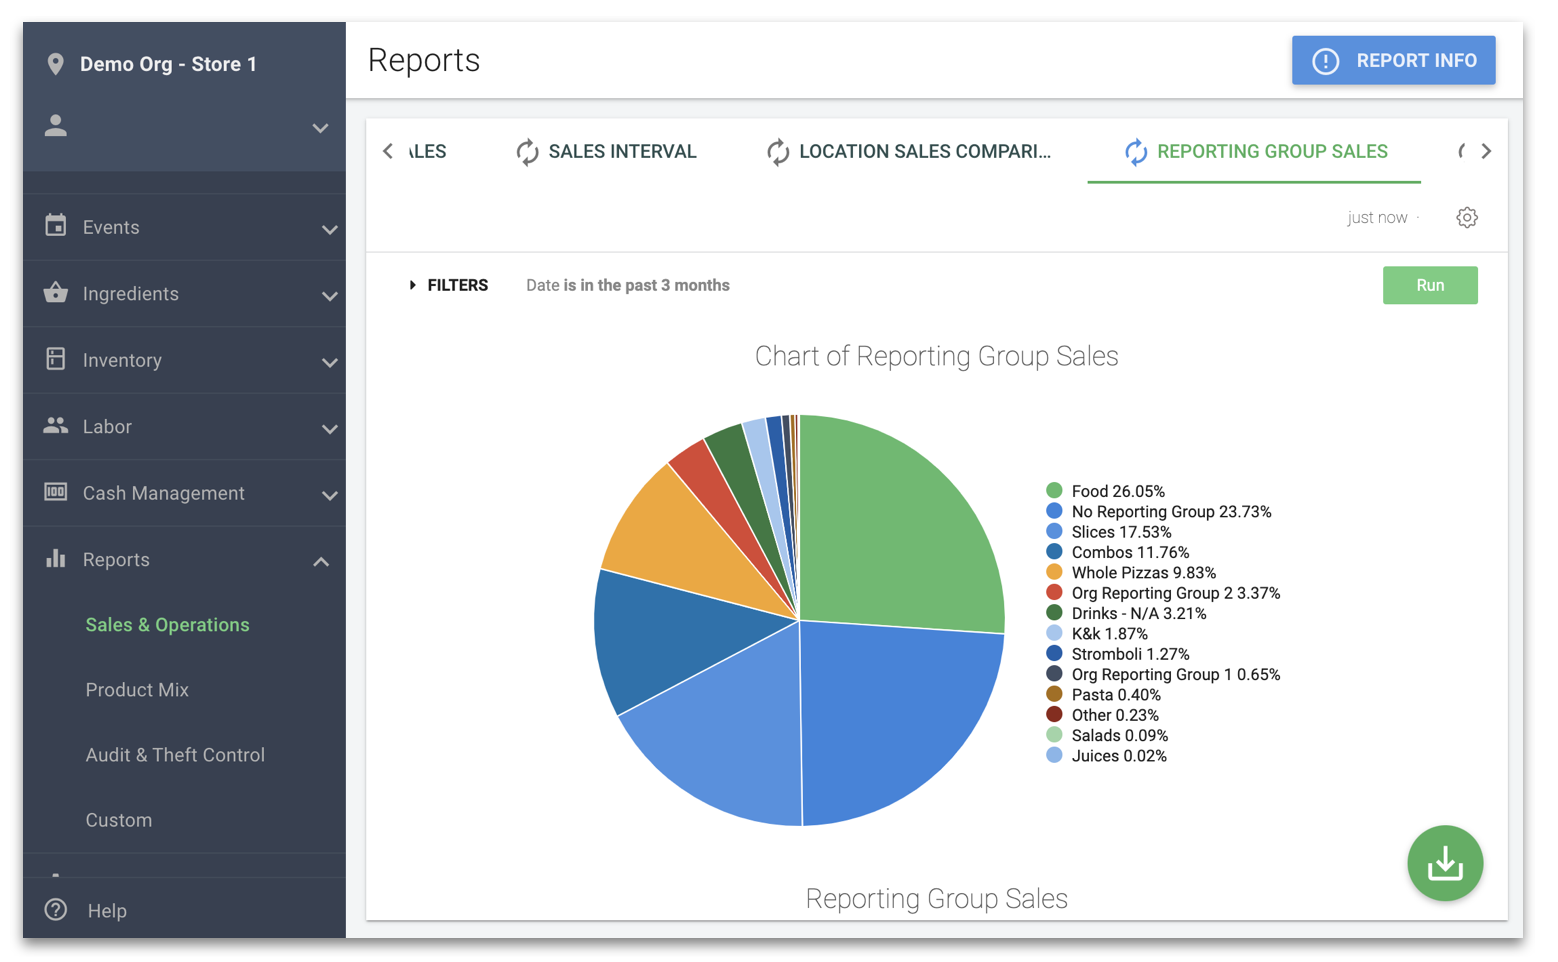
To view the Reporting Group Sales report you can navigate to Reports > Sales & Operations. For more information on the Sales & Operations Reports, you can click here.
Event-Based Operator Reports
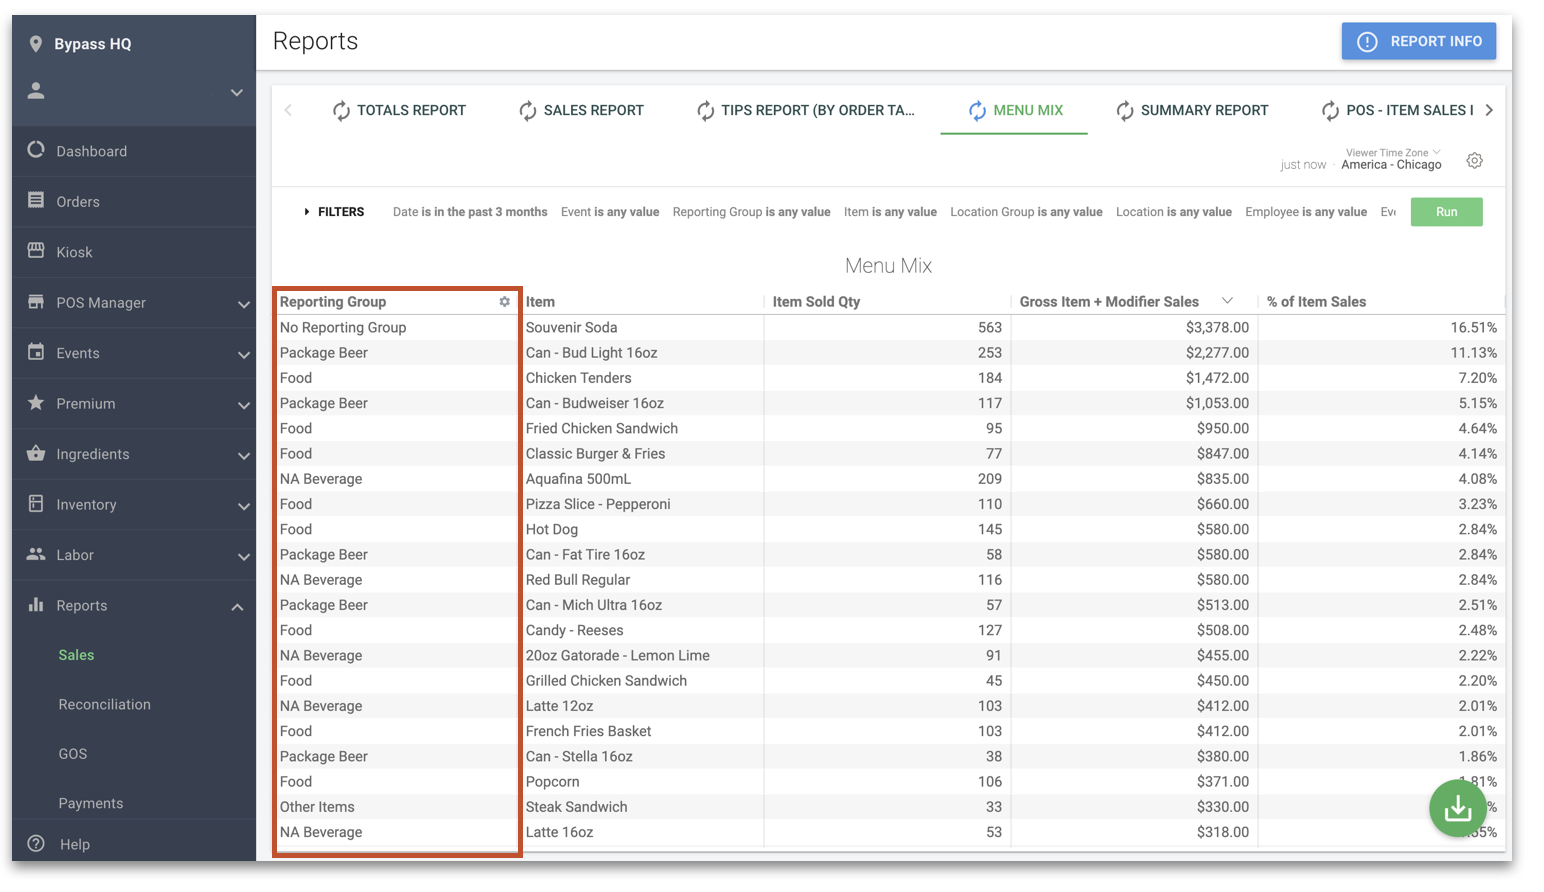
You can view the Menu Mix report by navigating to Reports > Sales. For more information on Sales Reports, you can click here.